
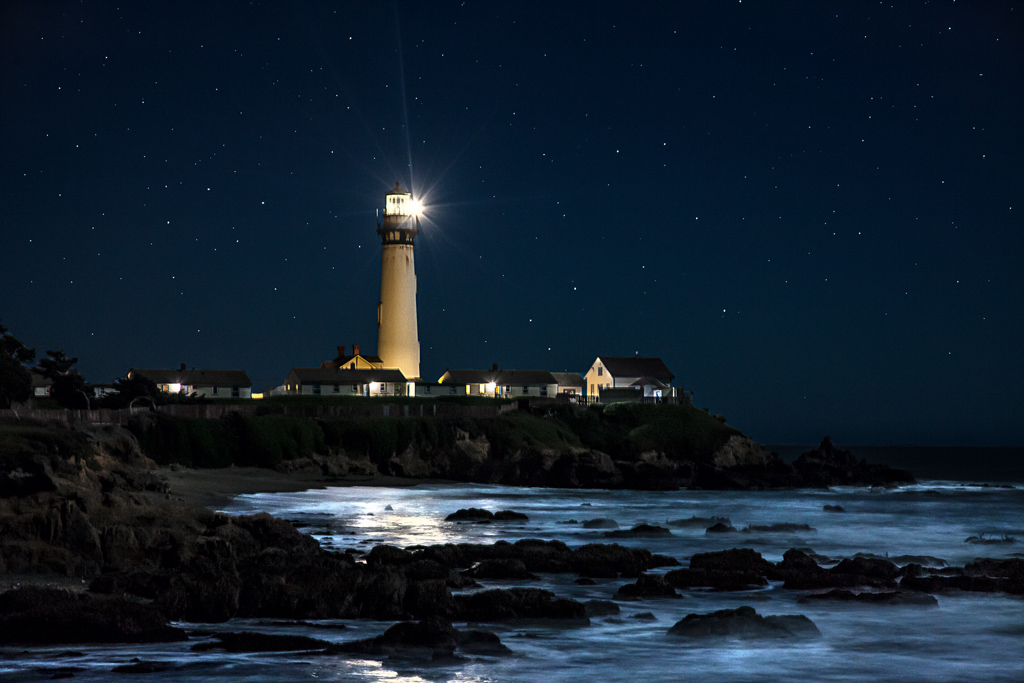
Digital noise has long been a plague for digital photography. It is where you get a random pattern of off-color pixels (usually darker) in your image. It generally becomes a problem at high ISOs and in long exposures. You can think of it like having your stereo speakers buzz and pop when you have it too loud.
But there are ways to combat digital noise. In fact, between camera improvements and software improvements, we have reached the point you can almost always keep digital noise from ruining your pictures. Seriously. It is usually avoidable with the right camera techniques and where it is not, it is easily fixable in post-processing.

In this article, I am going to show you how to make sure your photos are noise-free.
Step 1: Keep the ISO low
The number one most important thing you can do to reduce noise in your pictures is to shoot at as low an ISO as you can.
How can you do that? Slow down your shutter speed. Or try opening up the aperture on your lens. Consider adding flash if it is an appropriate setting. All of these things will allow more light into your camera so you an reduce your ISO and get the exposure you need.
One word of warning here though: you run a high risk of ruining your picture if you keep your shutter speed too slow because you are worried about increasing your ISO. Remember that you can fix noise, but you cannot fix camera shake.
This option is the most obvious, but it is also not always possible. So if it is not possible, the remainder of the items in this article should help you out.
Step 2: Noise Reduction Setting
If you need to use a high ISO, there are a few other items you can try. The first is to use the “long exposure noise reduction” setting. You will find this in your camera’s menu. Enable that feature and it will reduce the noise.
Be warned that this will double your camera’s exposure time. The camera is essentially taking two pictures and comparing them to figure out what is digital noise, and then eliminating that noise. It is a powerful technique in the right circumstances.
Step 3: Expose to the Right (or just reduce your ISO)
Another thing you can do in-camera is overexpose your image a little bit, or “expose to the right” as it is called. That means you should expose your picture so that most of the tonal values are on the right side of the histogram.
Despite the fancy name it really just means “overexpose your image.” The idea is that you can reduce the tonal values in post-processing, and it will result in a picture with less noise.
Without getting into it, suffice it to say there is a bit of controversy in the photography world about this technique. My own limited testing indicates that this technique does work a bit. Lighter values tend to produce less noise than darker ones.
But consider that when you overexpose your image to get all the tones on the right side of the histogram, you are using more light. Exposing to the right means making things brighter. How do you do that? By affecting shutter speed, aperture, or ISO. And if you are doing it by increasing your ISO, you are actually increasing the noise in your picture.
If you are not shooting at your camera’s lowest ISO setting, you are better off lowering the ISO than you are shooting with the values to the right of the histogram. If you are already at the camera’s lowest ISO setting, however, go ahead and shoot with the tones slightly overexposed (at the right side of the histogram) if you are already at your lowest ISO setting.
Step 4: A Quick Adjustment
Sometimes, a noisy picture coming out of your camera is inevitable. But if you do have a noise problem coming out of your camera, all is not lost.
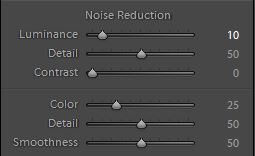
Oftentimes the fix is as simple as pulling the Noise Reduction slider in Lightroom a little to the right. That’s it, and it couldn’t be simpler. You can do the same thing in the Adobe Camera Raw screen of Photoshop or Photogshop Elements.
Step 5: A Global Adjustment Using Noiseware
If, after all that, you still have a noise problem, you can still usually fix it, but you might have to get a little more involved.
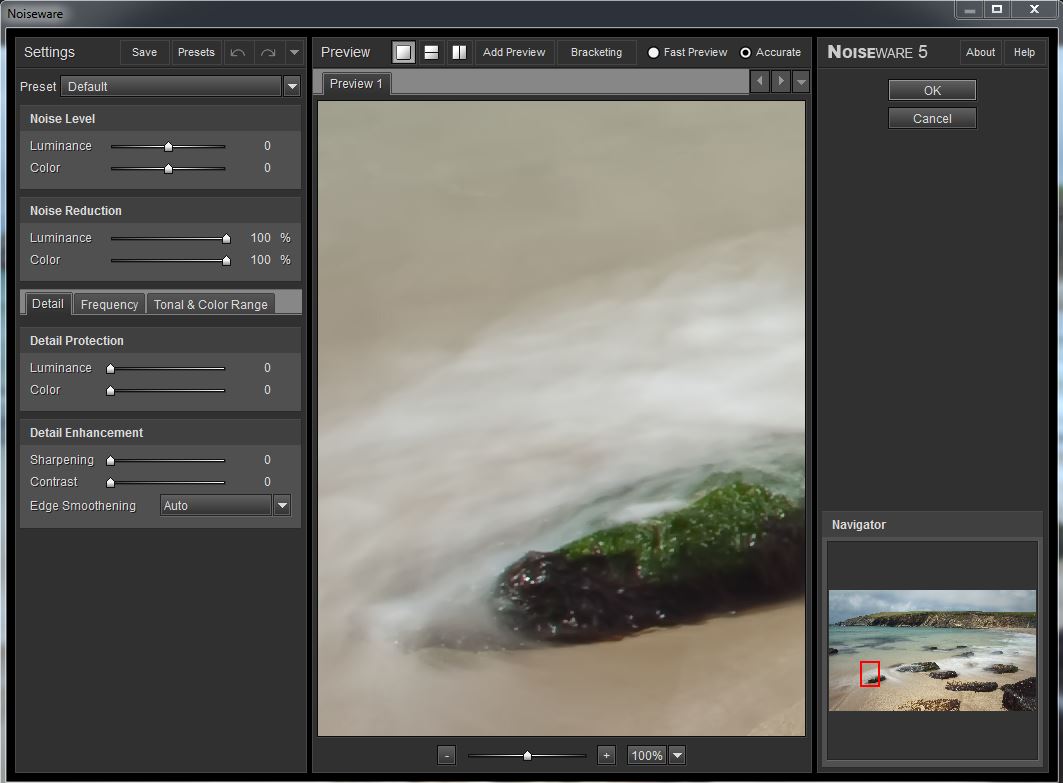
There are noise reduction software applications out there that are fairly inexpensive and are simple to use. I personally use Noiseware. It costs about $80 and it works well.
Noiseware comes as a standalone product, or you can get it as a plugin into Photoshop. I have the plugin version, which I recommend if you have Photoshop.
If you are using it as a standalone, just open up the program and it will apply a default level of noise reduction to your picture. You can add change it from there. I will post a video that includes a walk-through of this program. It will apply globally across your picture.
Step 6: Target Specific Areas Using Noiseware in Photoshop
Noiseware really comes in handy if you can use it as a plug-in to Photoshop. The reason is that now you can take advantage of Photoshops layers and just apply the heavy-duty noise reduction where you want it. There are probably only particular parts of the picture that you really want to hit with heavy noise reduction. There are also probably areas of the picture where you really want to preserve the detail. So create a new layer and then use masking to apply it only where you want it.
Here are the specific steps:
- Ctrl-J to create a new layer.
- Apply your noise reduction to the whole picture, mindful that you are going to apply it only to certain places as we go forward.
- Go to “Layer” under the top drop-down menu and select “Layer Mask” then then choose “Hide All.”
- Now select the Brush tool, set the paint to white, and paint where you want the noise reduction.
- If you go over or paint too much, change your brush to black to hide it.
- You can also play with the opacity of your brush to apply the effect only partially.
Step 7: Buy a New Camera
If all else fails, you can throw some money at the problem!
Seriously, noise-reduction is where newer cameras and cameras with larger sensors really shine. It is a simple fact that a camera with a small sensor is going to have a much bigger noise reduction problem. So is an old camera. If you are having a problem with digital noise, it might mean it is time to upgrade your camera.
Give these a shot and let me know how they work out for you or if you have any questions.
I enjoy all of your articles ad find them very useful. I just finished your piece on noise reduction. I have a Sony a7 R. You say to shoot in the lowest ISP reasonably possible. This camera has a couple of settings below 100. I usually shoot with ISP at 100 unless I am in a low light situation. The lower ISP settings I use when I am trying to restrict the light, ie when using a ND filter to blur the motion of flowing water, etc. My question, based on the information in your article, should I be shooting with the lower iOS settings when there is plenty of light?
Thanks for all your great information..
I’m glad you find all this useful!
I think you have it exactly right. I probably should have said to shoot at the lowest “native” ISO, which is what you are doing. For general bright-light shooting, I’d stick with ISO 100. (With that camera you have, I wouldn’t hesitate to go a little higher either.)
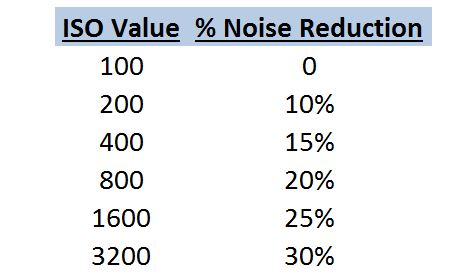
Usually, changes in ISO affects the light sensitivity of your camera’s digital sensor. The more sensitive you make the sensor to light, the more noise becomes an issue. The lowest ISO setting is typically 100. Some cameras, however, including the A7R, have an “extended” ISO mode that will allow you to go below ISO 100.
That “extended mode” is useful for restricting the light in the situations you mention, but it won’t reduce the digital noise at all, as I understand it. These extended ISO ranges are really just effects being applied by the camera, not changes to the light sensitivity of the camera’s digital sensor.
The lower ISO settings are really nice if, say, you find yourself in front of a waterfall and don’t want to mess with an ND filter. You can stop down the aperture and push the ISO as low as it will go to get you the slow shutter speed you want. But, again, they won’t improve your digital noise situation at all, so I’d stick to ISO 100 for general purposes.
It sounds like you are already operating in this manner, so all good. Hope this helps. If you have any other questions, let me know!