

If you already have Lightroom and you are not going to buy any other HDR software, you can still apply some HDR processing to your photos.
Lightroom has a built in HDR feature. It is not talked about much because:
- it is not very good, and
- you have little control over the result.
In fact, I’m not going to sugar-coat this: Lightroom HDR is terrible. You would probably be better off just doing a the Basic Lightroom Edit to one of your bracketed photos and using that.
Why am I even writing about it? Only because it is an option if you already have Lightroom and you do not want to get any other HDR software. Lightroom will do basic HDR processing and allow you to edit the photo further from there. Further, it is something to keep your eye on because Adobe has a sneaky habit of making terrible additions to products but then improving them over time. The HDR in Lightroom might one day become a good alternative for HDR processing.
How to Use Lightroom HDR
With that said, let’s go through how you create an HDR picture using Lightroom. Tone mapping in Lightroom is really easy. You just select the photos, let Lightroom run its tone mapping (be warned: it is very slow), and then Lightroom sends the photo back to your Lightroom Library. There are literally about 4 clicks in the entire process. Here are the steps for doing so:
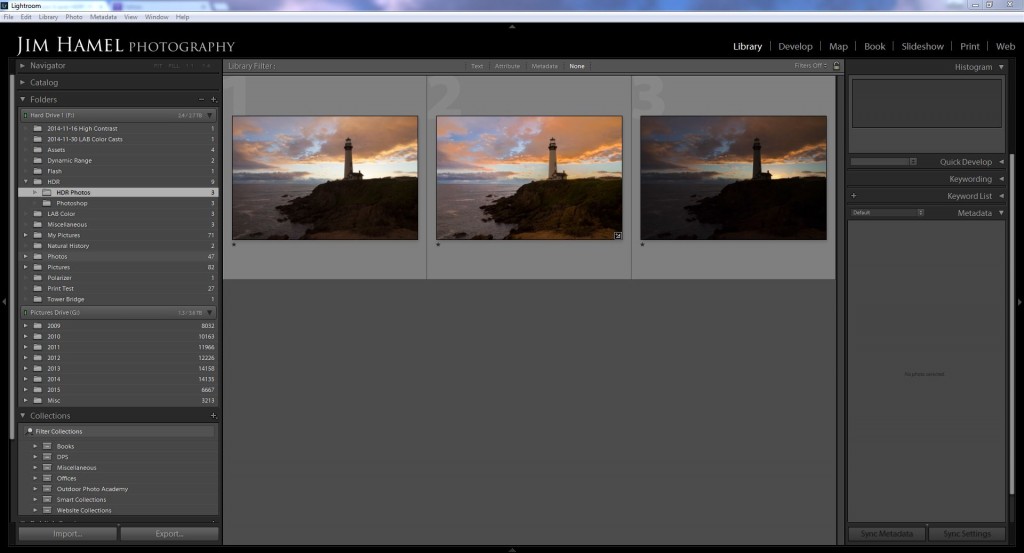
1. Select Your Photos
First, you need to select the photos you want Lightroom to tone map. The easiest way is to select the photos in the Library module, right-click, and select Photomerge than select HDR. You can also go to the drop down menu at the top, select photo, then Photomerge, then HDR. either way will cause Lightroom to begin processing your photos.
2. Tone Map the Photos
Lightroom will begin processing your photos immediately. As you can see from the resulting screen, you have very few options for controlling the result:
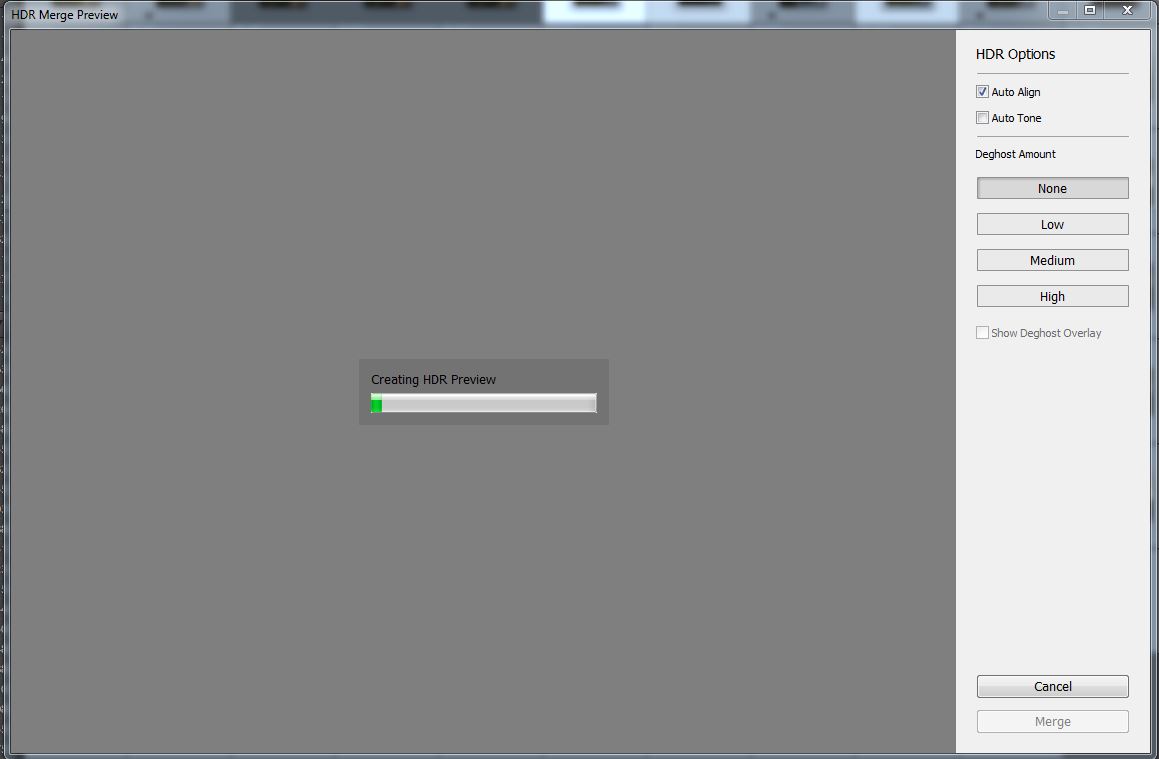
There are only two options for you to check when Lightroom processes your image: Auto Align and Auto Tone.
- Auto Align: Leaving this box checked causes Lightroom to align your images for you. You will almost always want Lightroom to align your images, so leave that box checked.
- Auto Tone: The next box allows you to decide whether Lightroom should apply processing to the photo. Leave this box unchecked. If you apply it, Lightroom applies some “processing” but it usually doesn’t look very good. In any case, if you leave this checked, you will discover when you get the picture back into your Develop module that all Lightroom has done is moved the sliders around for you (mostly reduced the highlights and increased the shadows). You can do that yourself, and better.
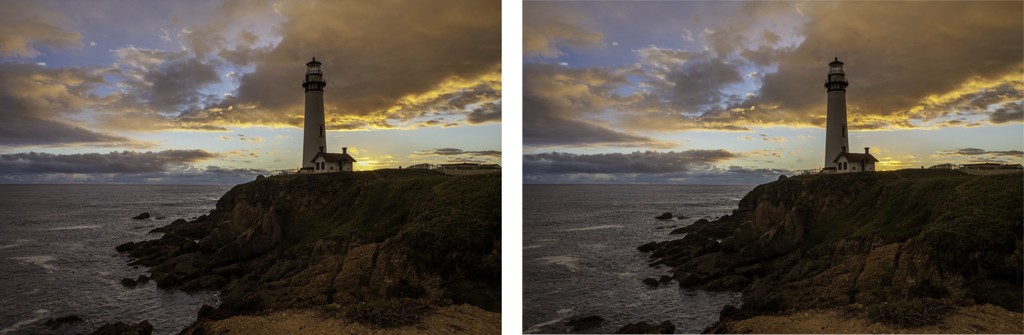
3. Import Back to Lightroom (automatic)
When Lightroom is done, just click Merge and it will create the tone mapped image and automatically import the file into your Lightroom Library. From there, you can edit it as you please in Lightroom, Photoshop, or other photo editing software.
Key Takeaway
Don’t expect miracles from this program when it comes to HDR. It is probably the worst available HDR processing software available and offers the least control over your pictures. But if you already have Lightroom and no other HDR software, this will get you started. You can either buy additional software later or wait for Adobe to improve this product, as they most certainly will.
Related Articles
Now that you’re done with this article, you likely understand that Lightroom HDR is probably not the answer for you. Therefore, here are some additional articles related to dynamic range and HDR:
HDR Efex Pro from the Nik suite is now free and plugs into Lightroom offering much improved functionality.
https://www.google.com/nikcollection/
Good point. I had mentioned this in a newsletter to subscribers but not anywhere on the site. Thanks for chiming in!