
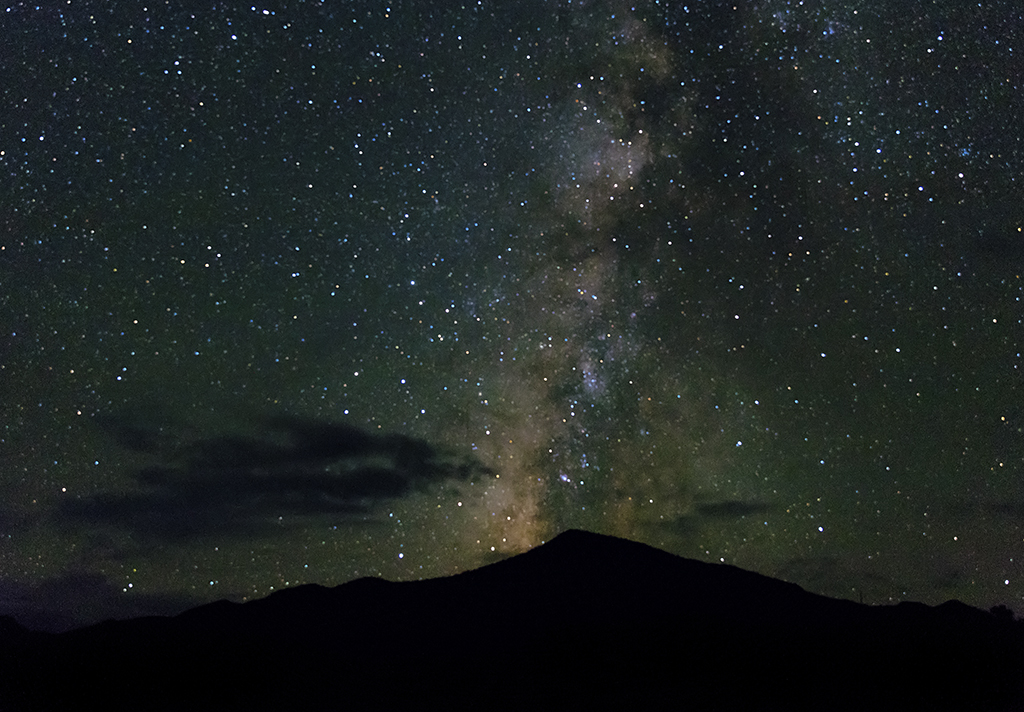

In a sense, photographing the Milky Way is easy. Composition is easy since the subject is obviously the Milky Way and you just aim at that. Your choice of lens/focal length is simple because you always shoot with your widest focal length to minimize the movement in the stars. Even your exposure settings are simple because they are always the same: 15 second shutter; wide open aperture; and ISO of 3200. The lack of light means that these settings are pretty much always the same. The whole thing sets up pretty simply, once you have done it a time or two.
But, in another sense, photographing the Milky Way is hard. To this day, I have many more failures than I do successes. The hard part is getting to the right place at the right time. There is so much that can go wrong. And if you get to the place you have chosen and you have a problem with the clouds, or the moon, or the Milky Way just isn’t present, there is nothing you can do. The evening is ruined. Most of us will have driven quite a distance to get out into a remote area to capture the Milky Way, so failure means a lot of wasted effort.
Therefore, when it comes to photographing the Milky Way, most of the work is done at home. That is where you’ll be checking locations and conditions to put you in the right place at the right time. To help you with that, I thought I would share with you the things I check and the resources I use to do so. That’s not to say these are the only or best resources, but they are the ones I use and I have found they work pretty well.
1. A Totally Dark Spot
As a threshold matter, you’ll need a really dark place. Not just kind of dark, but really dark. I personally use this map to find my places, but there are other maps out there.
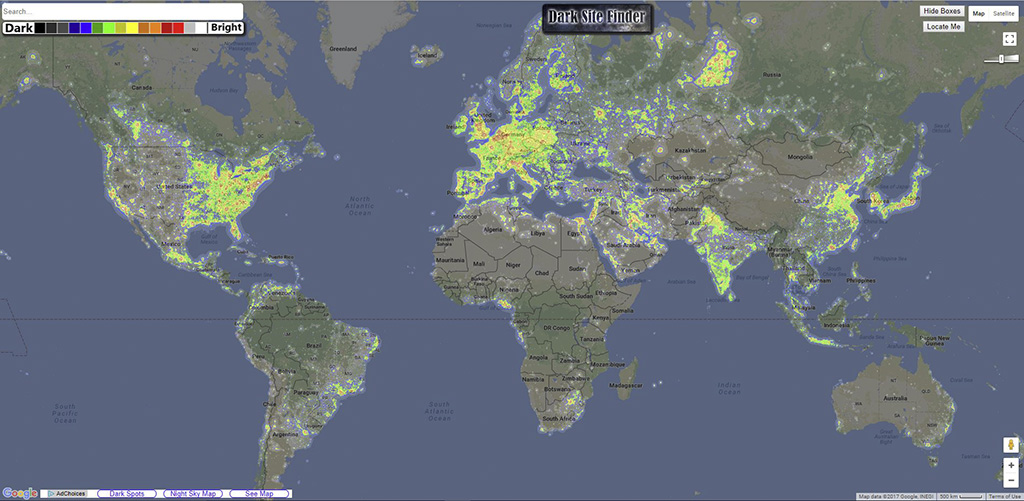
If you are heading someplace for the sole purpose of photographing the Milky Way, you may want to consider multiple locations in different directions from each other. That way, if it turns out that the weather is not conducive to shooting the Milky Way in one location, you can try the other one.
Resource: Dark Site Finder
2. A Clear Sky
Speaking of weather, that’s the next thing to worry about. Clouds obviously mean failure for a Milky Way shot. Of course, you cannot always predict what is going to happen, which is why I recommend considering multiple locations. When it comes to deciding what will work, obviously a Clear forecast is best. You can often make it work with Partly Cloudy conditions, but it is dicey. Anything beyond that, such as Mostly Cloudy, and you have no chance.
You’ll have your own weather apps, I’m sure. I use nothing fancy in this regard, and have found that most of them are pretty much the same. If you have a weather app that you like, just keep using it. The important thing is to keep checking it to make sure things haven’t changed.
Keep in mind that a clear sky means more than a lack of clouds. I have put myself in locations that show up as Clear on the weather app, only to have mists from the ocean or smoke from wildfires ruin the evening. You may need to check that as well, depending on your location.
Resource: The Weather Channel (or your favorite weather app)
3. A Moonless Sky
Do not overlook the impact of the moon on your pictures. If you try to capture the Milky Way when there is a full moon, you are destined for disappointment. Even lesser moons will cause you problems.
If you aren’t familiar with how the moon phases work, here is what you need to know. The key is that the fuller the moon, the longer it is present in the night sky. Conversely, the more of the moon that is shaded (leading to a new moon, when none of it is visible at all), the longer it will hang in the sky during the day. That means when the moon is mostly shaded it isn’t very bright and it also isn’t in the sky for most of the night, which is what you want. A full or nearly full moon, on the other hand, is a double-whammy of sorts. Not only is it very bright, but it is also in the sky all night. There is no getting around it.
For this reason, you should generally plan your trips when there is less than a quarter moon. To check the moon phase, use this website (although many weather apps will show you this information as well). Doing so will keep the moon out of the sky much of the night. It will also keep it from dominating the sky when it is up. The best feature, however, is that it will show the time when the moon rises and sets. That way you’ll know the times of night when there is no moon at all.
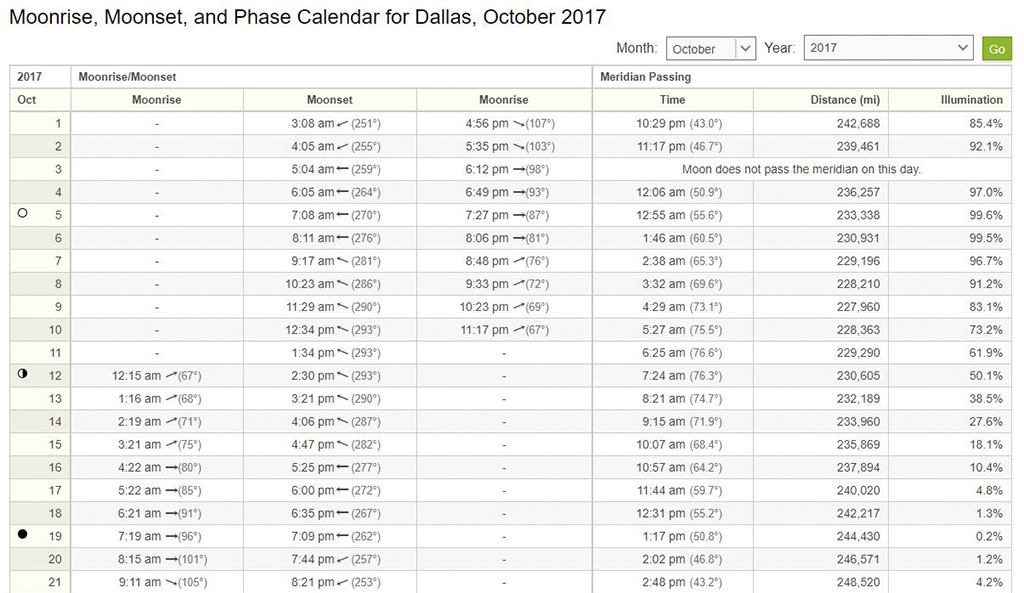
Doing that sometimes isn’t enough. You’ll also need to check the location of the moon as compared to the Milky Way. Of course, if the moon isn’t visible when the Milky Way is visible, you’re in business. But when both are present, it is possible you can still get a shot of the Milky Way as long as they aren’t near each other. The website I referenced above shows the direction of the moon (with an arrow and degrees) and the percent of illumination as well.
Resource: TimeAndDate
4. The Milky Way
Oh yeah, you’ll probably want the Milky Way to be present for your shot as well. So you’ll need to check that.
First of all, make sure you are planning your outing in the right time of the year. In the northern hemisphere, that usually means between May and October. Between June and August are best. Don’t try from November to March, because the Milky Way won’t be visible at all.
Even if you do out during the correct months, the Milky Way may only be visible at certain times of night. Therefore, you’ll need to plan to be in your location at the right time. To do that, I recommend an app called Star Walk 2. I have been using this for the last few months and found it really useful. I know nothing about astronomy, so being able to look at the app and have it tell me when things are going to line up for me has been amazingly helpful. To learn how to set up and use the app, check out this tutorial from a great photographer (and DPS writer) named James Brandon.

Resource: Star Walk 2 (Apple) and Star Walk 2 (Android)
5. The Good Part of the Milky Way
Keep in mind, however, that just because you’ll see a band of the Milky Way doesn’t necessarily mean you will see the part that looks best in pictures. You’ll need the brightest clump of it to be visible (and free of obstruction from the moon and clouds). Otherwise, the Milky Way will just be a dull strip in the sky.
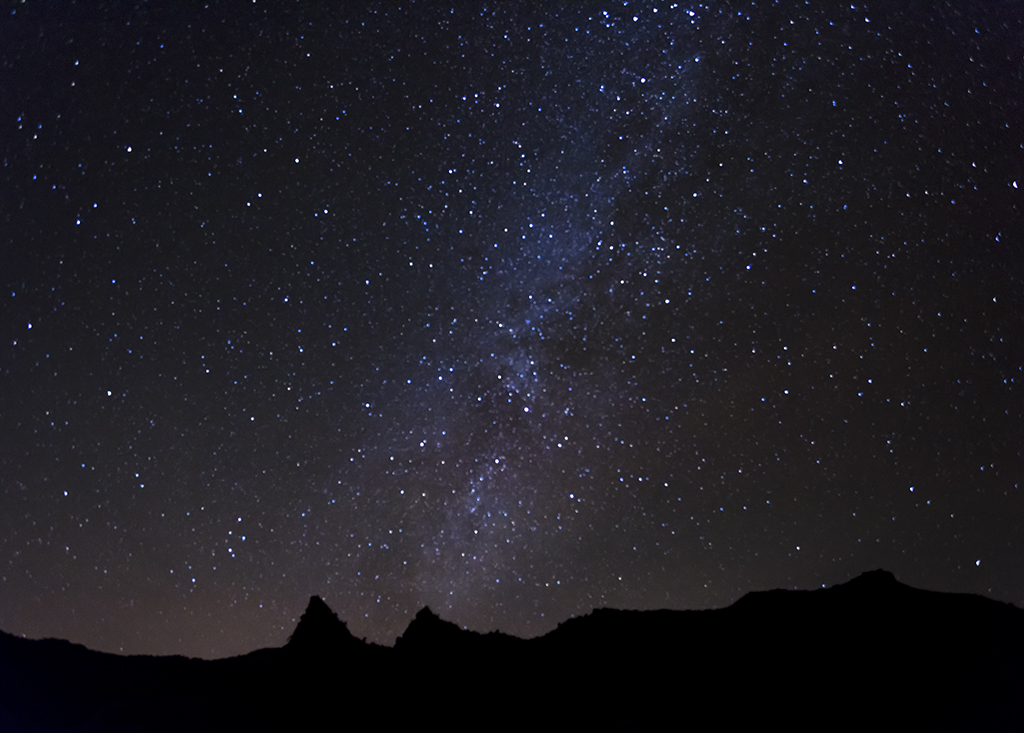
The best way to check that is to scroll around with Star Walk. Set it up for the proper location and then move the times forward and backward and watch what happens. (Again, check out this tutorial if you have never used it, because getting started with the app isn’t entirely intuitive). Check out the times in which the best part is visible. Not only that, but compare that to when the moon is out. Sometimes they move together, which is frustrating. Similarly, check the direction of the Milky Way. Make sure you aren’t shooting in the direction of any cities in the distance or other light pollution.
Resource: Star Walk 2 (Apple) and Star Walk 2 (Android)
Putting It All Together
Now it is time to put all this together. You’ll need to check your information against other information. The right location on one night can be the wrong location on another night. You can have clear conditions in a very dark location, only to have the moon ruin things. There is a lot to keep track of, especially if you are considering multiple locations. Personally, I create a chart showing all these different factors. Then I update it as weather conditions change.
Remember – this is where you determine the success or failure of your Milky Way pictures. The field part is easy. But don’t be discouraged if things don’t work out. It is taken me a lot of failures to figure all this stuff out. Even when you do, conditions change. But when you get it right, you’ll find it an easy matter to create a stunning picture.