
Printing used to be really hard. Photographers spent all day in the darkroom just to make a handful of prints. Now, thanks to improvements in inkjet printers, printing is much easier to do yourself. In addition, thanks to Lightroom, it is much simpler than it was just a few years ago. In this article, I’m going to walk you through the process of making a print. I’m not going to get into color management, printer profiles, and other technical details. Rather, I am going to make my own print using Lightroom and an inkjet printer, then document the process in a series of pictures and graphics.
You can either just follow along or make your own print at the same time. Either way, hopefully you will see how simple the printing process is in Lightroom.
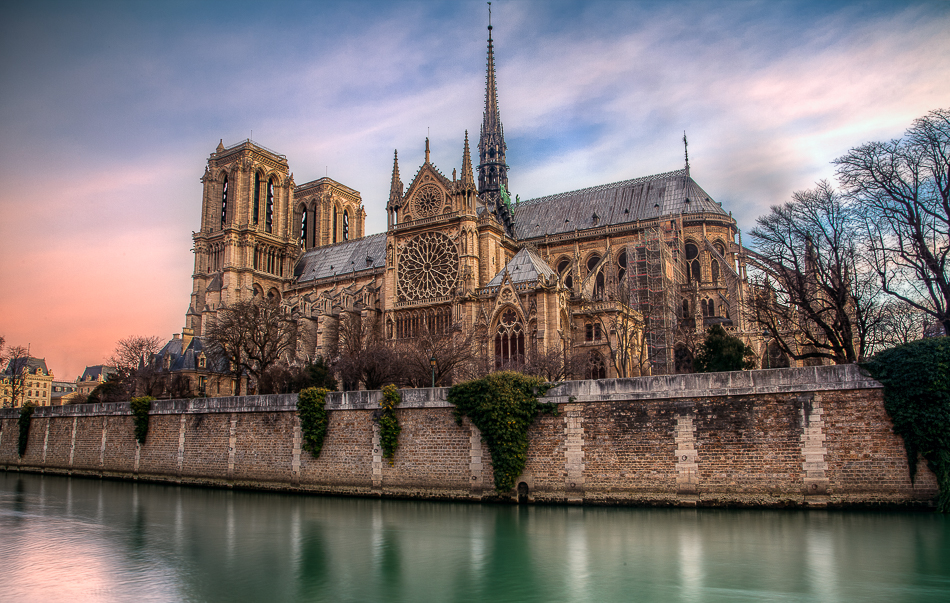
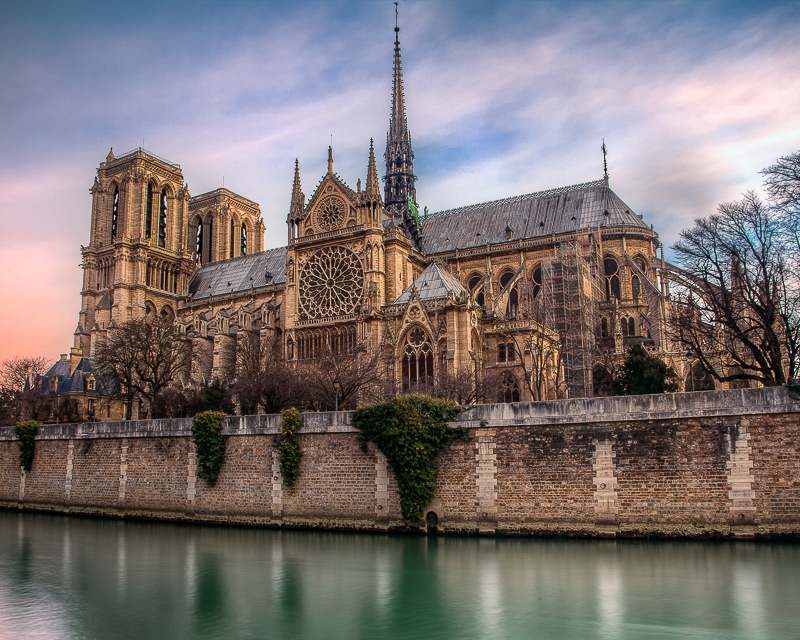
Let’s get started. First, I need to choose my photo for printing. I chose a picture of Notre Dame with the Seine in the foreground. Here is the original picture:
My picture has already been edited and is the way I want it. If yours is not yet edited, take it into the Develop module and do so now before continuing.
Step 1: Make Sure Your Photo Fits Your Frame (or how to adjust the Aspect Ratio)
Right away I run into problems. The mat and frame I have set aside for this is an 8 x 10 inch (20 x 25 cm) photo. This picture won’t fit.
You will run into this problem all the time to a greater or lesser extent. Rather than discard this photo and choose another (which I considered), I want to walk you through the process I use to deal with it.
Yes, you can cut a custom mat or have your local art store cut one for you. I’m not going to to that. Every attempt I have ever made to cut matting has ended in failure. I do not want to wait for the mat to be cut – I want to print and frame the picture now. That being the case, the options pretty much boil down to either (a) print the photo so that the short side is correct and just deal with the overlap in the long side after you have printed the photo, or (b) try to get it right in Lightroom through cropping. I’m going to deal with it now.
To do so, I will take this picture into the Develop module and choose the Crop tool. Once the Crop tool is selected, you can choose the Aspect ratio. Click where it says “As Shot” to the right of where it says Aspect.
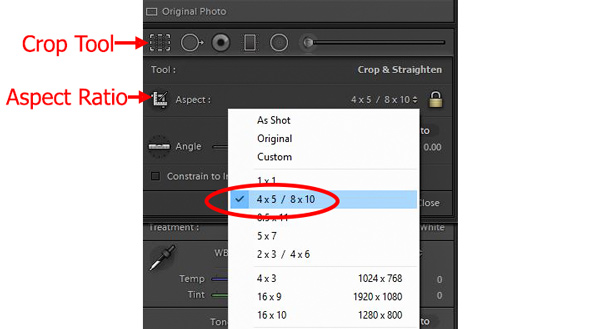
When you click on As Shot, a number of different aspect ratios will be listed. If you don’t see one that fits, you can set a custom aspect ratio. In my case, I chose 4 x 5 / 8 x 10 since my mat and frame is for an 8 x 10 picture. When you choose an aspect ratio, Lightroom will put an overlay on the picture showing where it will be cropped:
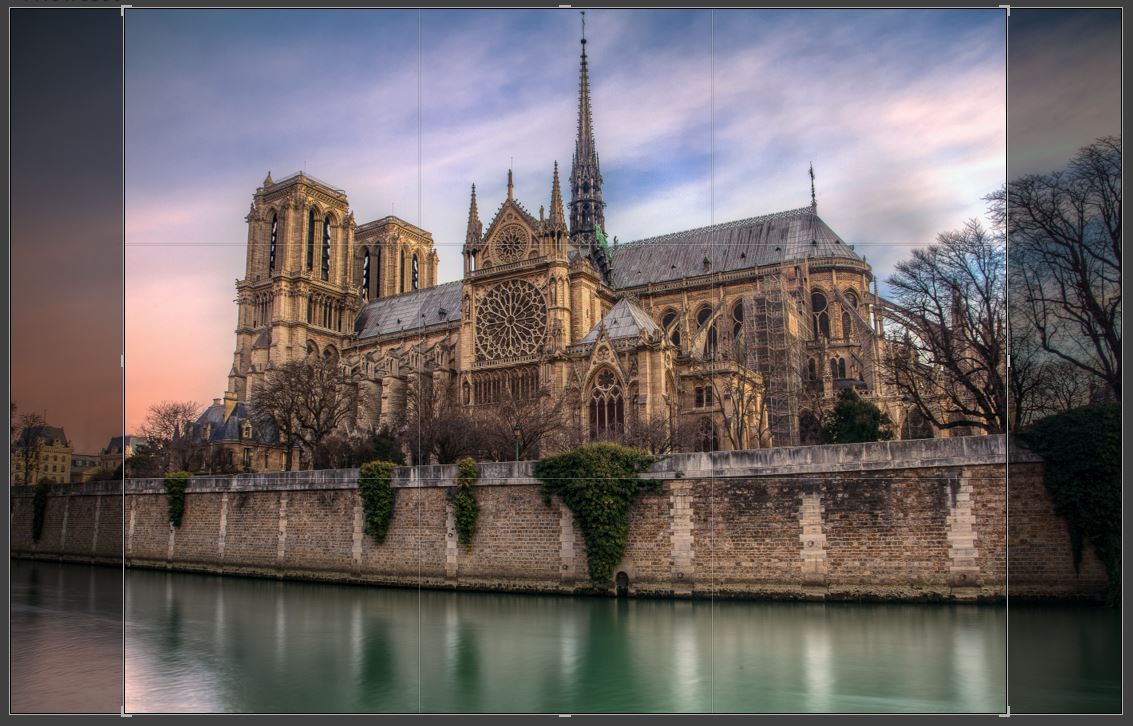
From there, adjust the photo until it is cropped the way you want it. Here is how I cropped the picture so it would fit the frame:
At least the picture will fit the frame when I’m done.
Step 2: Setup Your Page (sizing, paper, etc.)
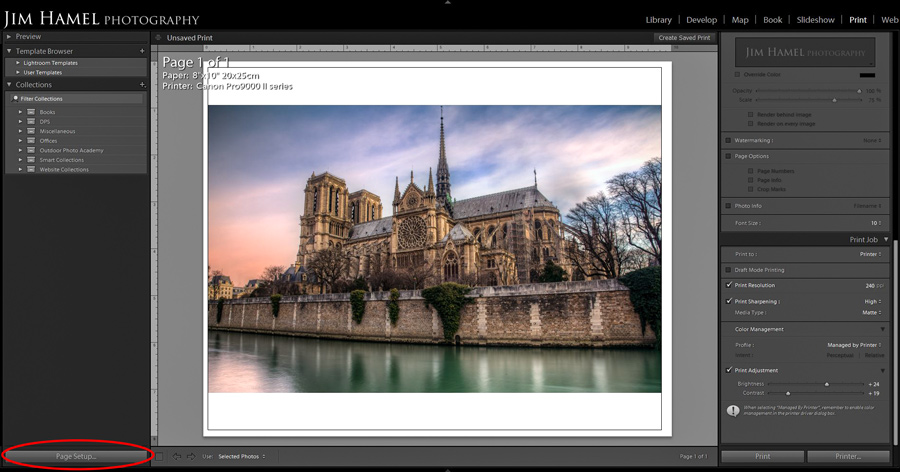
Ok, now we are ready to start working on the picture in the Print module of Lightroom. First bring the picture into the Print module by clicking on the word “Print” on the top right of the screen:

Once the picture is in the Print module, the first thing you should do is choose the paper and the size of the print. You will do that by clicking on Page Setup on the bottom left of your screen. Here is how the screen will look when you enter the Print module, with the Page Setup button identified:
When you press the Page Setup button, the following dialog box appears (at least on a Windows machine, which is what I am using):
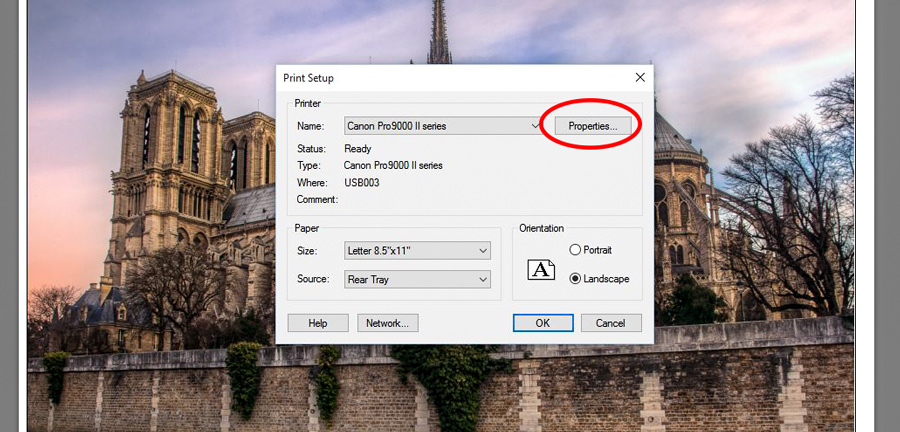
You can select your paper size in that dialog box, but I prefer to click on the Properties button (circled in red above) because it gives you a few more options and specificity. When you click on Properties, this dialog box appears:
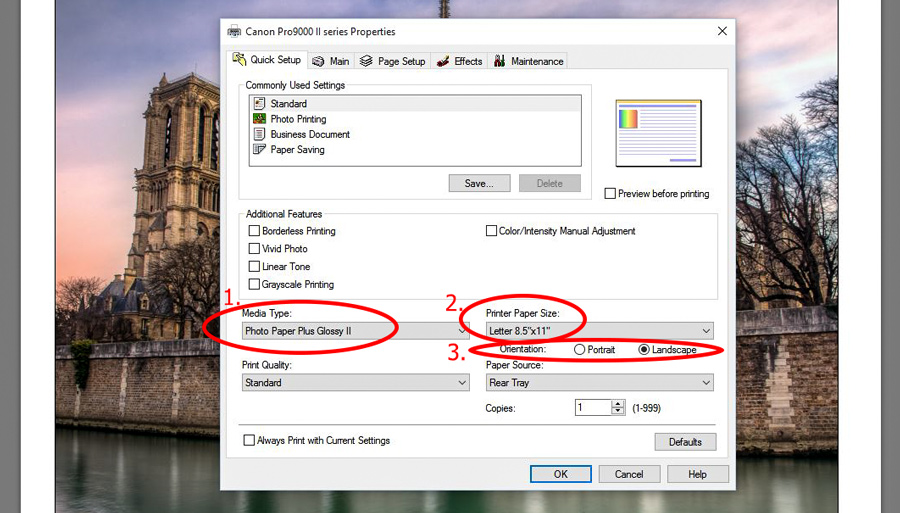
You will do three things in this dialog box.
- Pick Your Paper: You first pick your “media type” or paper. If your specific type of paper is listed, choose it. If not, pick something that is close. I am using a specific type of glossy paper that is listed among the options, so I picked it (Photo Paper Plus Glossy II).
- Pick Your Paper Size: Next you will pick the size of the paper your are using. This will not be the size of the print. This will be the size of the paper that your are inserting into the printer to make the print. In my case, although my print will be an 8 x 10 inches (20 x 25 cm), I am using 8.5 x 11 inch (22 x 28 cm) paper, so that is what I chose.
- Pick Your Orientation: Finally, you will choose whether your photo will be vertical or horizonal. In my case, it will be horizontal so I chose Landscape.
When you are done with that, click OK. Then click OK on the Print Setup dialog box as well. You are done setting up your paper.
[box type=”info”]Note that I recommend making a test print on 4 x 6 inch (10 x 15 cm) paper first. That way if there are problems, you will not have wasted a large amount of ink or a large sheet of photo paper. If you do that, you will be visiting the Page Setup dialog box more than once during this process.[/box]
Step 3: Setting Up the Print Layout
Now you will begin using the Lightroom Print module in earnest. What you will do is work your way down the right side of the Print module controls. I will show you what to do in each one.
a. Layout Style
The first one you will come to is called Layout Style.
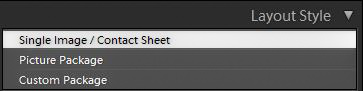
Here, just choose Single Image / Contact Sheet. The other options are for those occasions when you want to print multiple photos on one page. That is now what we are doing today though, so just stick with Single Image.
b. Image Settings
Next up is Image Settings. I rarely use any of these settings, and in this particular case I have left them all unchecked. In fact, I never use any of them.

In the event you find these controls useful, here is how they work:
- Zoom to Fill: If you check Zoom to Fill, it will essentially crop your photo. We could have used this technique instead of addressing aspect ratio up front, but the Crop Tool gives us more control over the process.
- Rotate to Fit: You can also use Rotate to Fit to rotate your photo if it is showing up as a horizontal when your paper is vertical (and vice versa).
- Stroke Border: Check this box to add a border to your photo, then set the size by using the Width slider. Lightroom will reduce the size of your photo to fit the border in the dimensions you set for your photo.
c. Layout
Next we come to Layout, where you will size your photo and adjust it within your page.
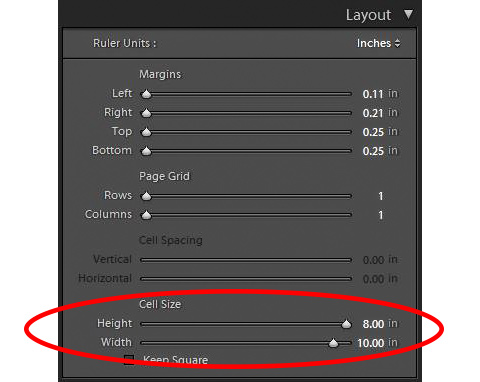
I use Cell Size to set my picture size at 8 by 10 inches. You can make the photo smaller by adjusting Cell Size or by increasing the margins.
d. Guides
The next set of controls allow you to set guides to see the dimensions and layout of your photo. These guides will not have any impact on your photo.
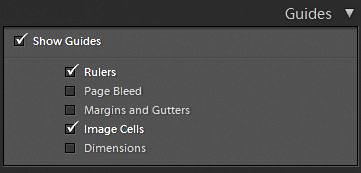
Leaving Rulers checked means that Lightroom will display rulers across the top and along the left side of the screen. That will allow you to see the size of the image. Frankly, you probably already know the size, but I leave it on since the rules don’t get in the way of anything.
I also leave Image Cells checked. It shows the cell or cells that contain your photo. Again, it is nothing I am concerned about, but it isn’t a distraction either.
e. Page
Finally, we come to the Page section. This allows you to add information to your photo like a watermark, identity plate, page numbering, etc.
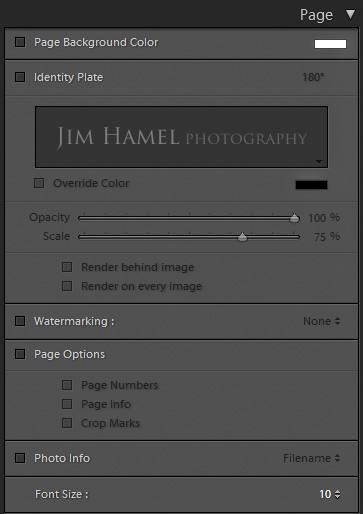
What I am focused on here is making a print of a picture without any markings on it. That’s what I’m also trying to pass along to you. So, while I want to make you aware that they exist, none of these options should concern us at the moment and we’ll skip over them.
Step 4: The Print Job Box
Our picture is now laid out and properly sized. There is one more box of controls as we work our way down the right-hand column of the Lightroom Print module. It is the Print Job box. These controls are very important so I want to address them separately.
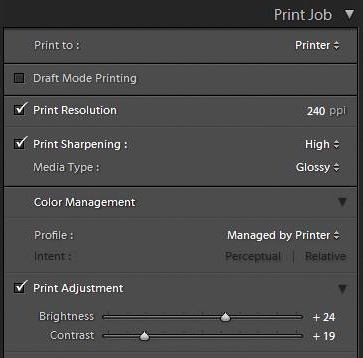
The boxes that are checked in the graphic directly above are the important ones. Here is what they are all about:
- Print Resolution: This is the resolution at which your picture will be printed. Check your printer and see what resolution it recommends you use. If you don’t know, use 300 ppi as a default. I set this at 240 ppi because I had previously read that was the proper setting for Canon printers (although I am not sure about that and am actually researching it further now).
- Print Sharpening: Even after the sharpening you apply in the Develop module to fix the inherent softness of Raw files and make your photos look sharp, there is a final round of sharpening done at the end of the process called Output Sharpening. This is where you tailor the sharpening of your photo to the manner in which it is displayed. Here, obviously, we are making a print, and because there is a certain amount of flow to inks, prints require more sharpening then photos displayed on monitors. Choose the High setting here. It will work well for most prints, but if your print appears oversharpened (it usually won’t) back it down to standard.
- Print Adjustment: If your monitor is properly calibrated, you don’t need to use the Print Adjustment settings. As you can see by the fact that I have checked the box and made adjustments, my monitor is not properly calibrated. What you are doing here is making the print look like your monitor. Through a series of test prints, I determined that I needed to add +24 to the Brightness and +19 to Contrast to make my photos like they do on my monitor. If your monitor is not calibrated, make some small test prints and adjust these settings. Lightroom will then remember this setting and keep it at the same level for future prints.
Again, these are important settings because they affect the way your photo appears in print. Take some time with these.
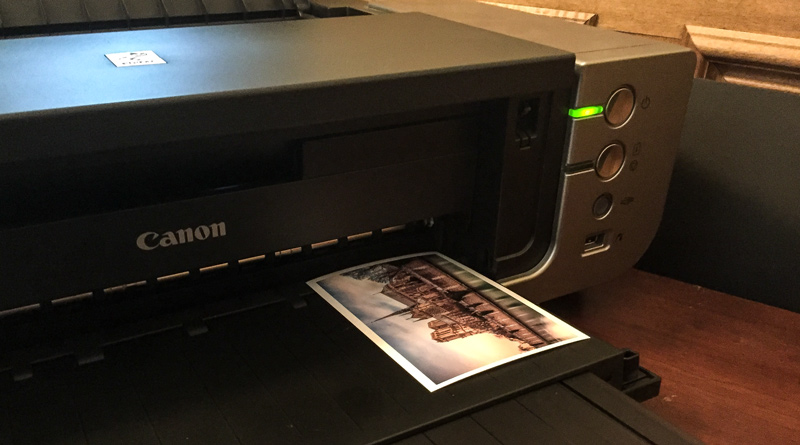
Step 5: Making the Print
That’s it. It is now the moment of truth. You can make a print.
When you do, you will first have to wait approximately 3 days for your printer to run through its cycle and warm up. After that, it will fail to print because it turns out you are out of one color of ink. You will now have to go to the store and pay more for ink than you would if you had the foresight to order it online. Anyway, when you return from the store with the ink, insert it and have the printer run through its cycle again.
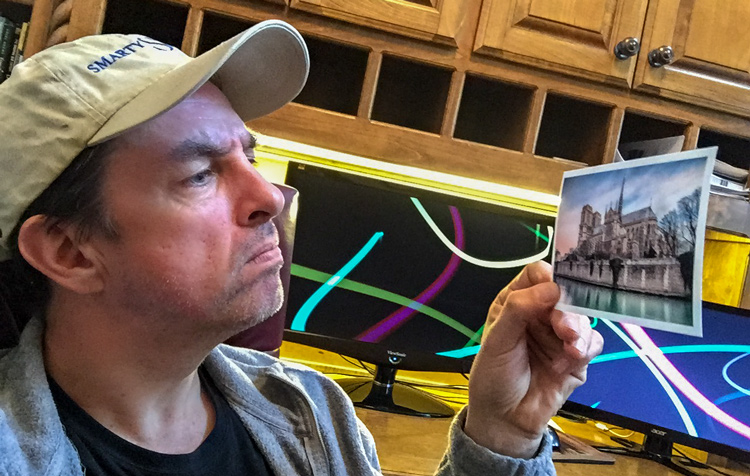
Ok, with that out of the way, you are actually ready to make a print, but before you do, you might want to make a small version of it. I keep a lot of 4 x 6 inch paper around for this purpose.
Then look over your test print for any issues. Make sure the colors, brightness, and contrast all look good. Make sure there are no unwanted spots or sensor dust to remove. If there are, take the picture back to the Develop module and fix it up. If not, you are ready to make your full size print.
To make the final print, just put your paper size back to what you want by going back to Page Setup. In my case, I am using 8.5 x 11 inch paper, so that’s what I set. In addition, check the Cell Size under Layout to make sure that it is the size you want. And then, at long last, hit Print.
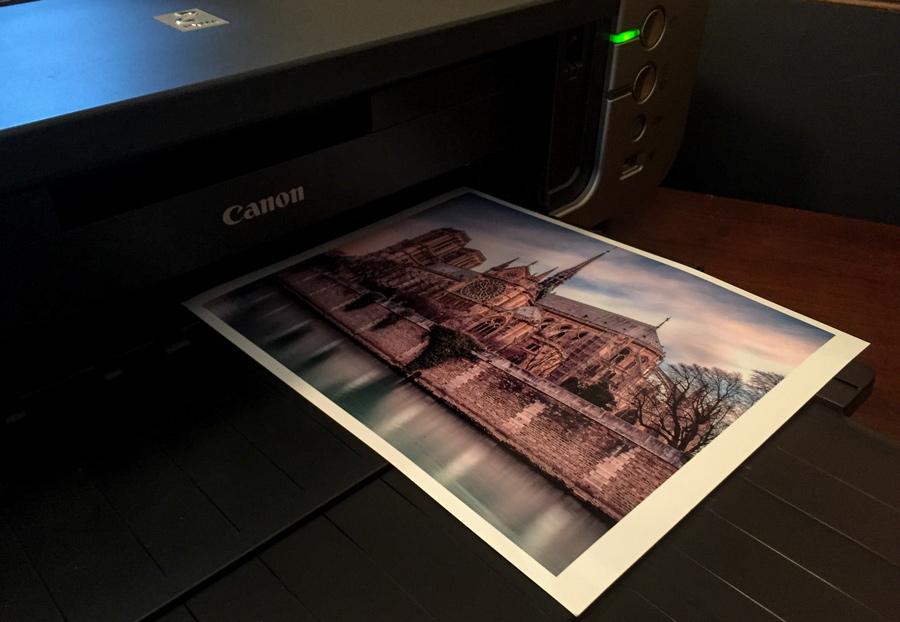
You now have your final print.
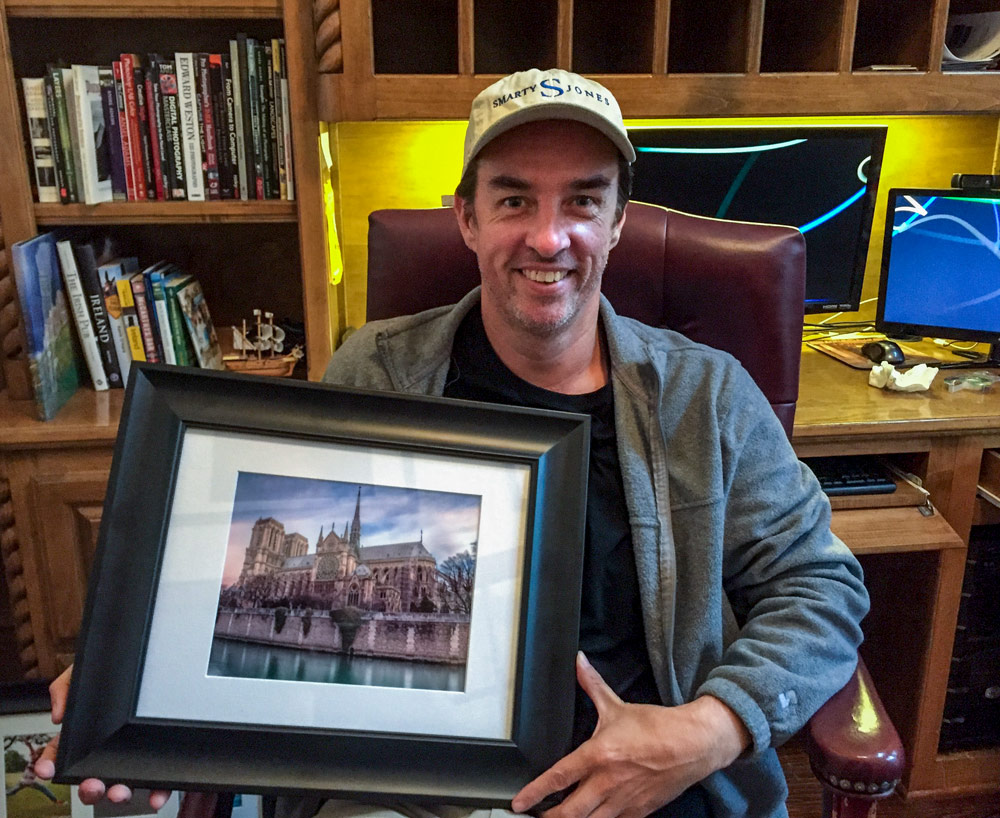
Step 6: Framing Your Print
I’m going to frame this print. If you haven’t framed a print before, it is easy if you use standard size frames and mats. I will walk you through it quickly.
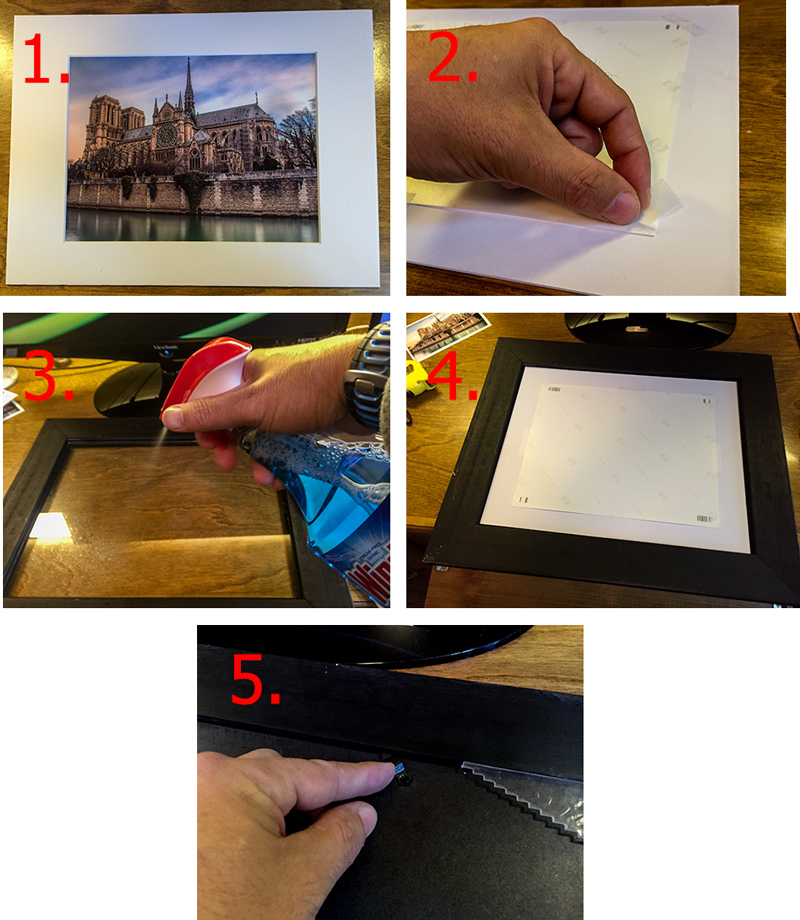
- Fit the Mat Board over the Print.
- Flip the mat board and print over, while holding them together so there is no slippage. With the mat board and print face down in front of you, tape the print to the mat board.
- Clean the glass of the frame, inside and out. Once you have your picture mounted, you won’t want to take this frame apart and clean it if you find any imperfections.
- Place the Mat and Print back in the frame, with the print facing the glass.
- Re-attach the back of the frame.
That’s it – enjoy your new framed print.

Great article, Jim. I don’t currently use the Print Module in LR, but it’s nice to have a good tutorial in case I want to try it. Thanks.
Rarely do you see any tutorials on printing. Thank you for filling this need for me.
I have been having trouble printing out of lightroom. This article has cleared up a lot of questions I had about the work flow for printing. Very helpful, thanks. By the way, how is the cheap ink working out?
Thanks! And the cheap ink is still working great. I keep looking at the original prints to see if any problems are developing but so far so good. I will update at some point.