
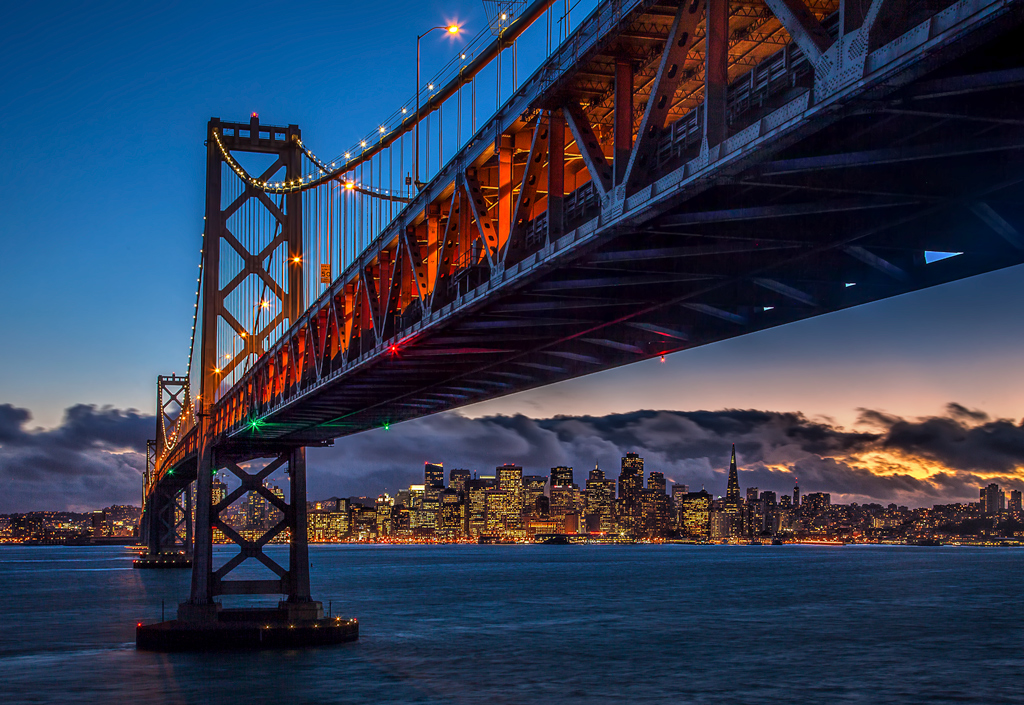

I want to use this picture as an example because it is a poster child for some of the research tips I have mentioned.
I was just going to San Francisco for a one-day business trip. I thought I would have a chance to get away for the evening so I brought my camera. As I have mentioned, one of the best ways to find good places to photograph is the of the 500px World Map. That is how I found that people photographed from under the Bay Bridge to get the San Francisco skyline. Once I found where I wanted to go, I use Google Maps Street View to plan it out. Without having done so, I never would have been able to get to this location. It is on private property. There is no legal parking for a few miles. You have to walk down a steep incline. This took some planning. If I had just showed up without knowing when I was getting into, I never would have been able to get here.
I went to this spot a little before sunset. I was dubious about staying too long because I was pretty sure I was trespassing and I was quite sure I was in danger of having my car towed. I stayed as long as a could, and this was the very last shot I took. Given that, it is quite possible that the shot would have gotten even better had I stayed longer.
Exposure settings
Once I got there, the exposure settings were fairly straightforward. Here is what I used for this shot:
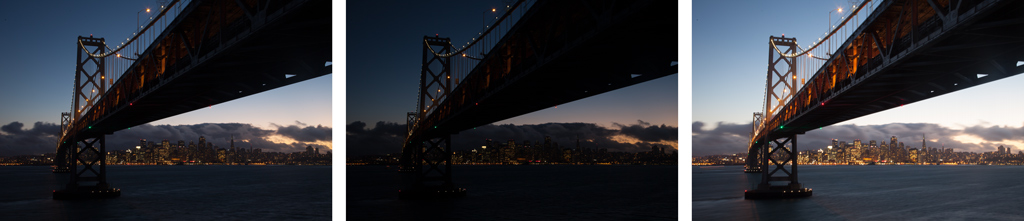
- Shutter Speed: Bracket of three shots at .8 seconds, 2.5 seconds, and 8 seconds.
- Aperture: f/13
- ISO: 200
- Focal Length: 45 mm
I’ll discuss more about these settings below.
Effects And Processing
There were three things I was focused on to make it successful, all of which involved action in the field and at the computer. Those are: (1) keeping all the tones with the cameras dynamic range, (2) making the buildings sharp, and (3) blurring the water. To give you an idea of the issues I faced with each, here is a quick photo I took with my phone:
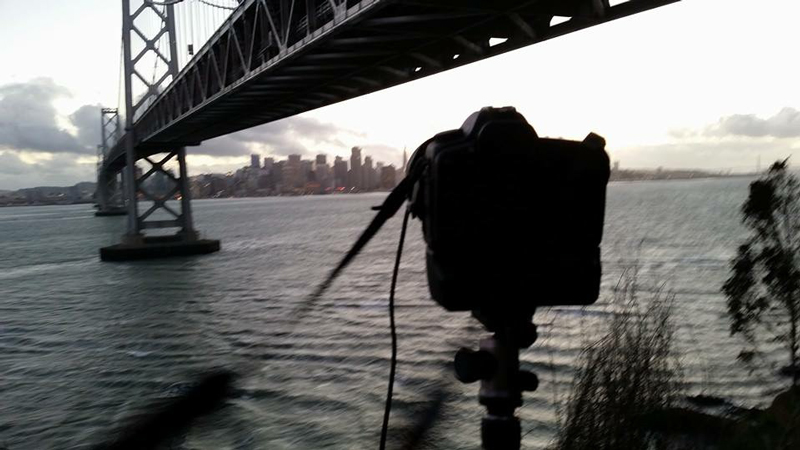
From this picture, I hope you can see the problems I faced in the 3 areas I mentioned above. The sky is blown out here, showing that there was a dynamic range problem that I needed to fix. You can see the camera strap blowing in the wind, showing that stability was an issue. Finally, you can see how the water looked without any blurring. Anyway, here is how I dealt with these issues.
Dynamic Range
I knew I had a dynamic range problem. The sky was moderately bright and everything else was dark. Therefore, when I was taking the pictures, I bracketed virtually every shot I took. You can see the original bracketed photos above. The shots were 1 2/3 stops apart from each other, which is pretty standard for me when I am worried about dynamic range. When I got the picture to the computer, I made a HDR files using Photomatix, HDR Efex Pro, and Photoshop. I then been blended them with the original file, which I had edited in Lightroom to get the tones I wanted.
Sharp Buildings
In order to make the buildings as sharp as possible, I knew I needed to keep the camera as steady as possible. I had the camera on a tripod and using a remote shutter release. I was also using the cameras live view, which lock the mirror in the up position. The problem I faced was that it was very windy. It was blowing everything around and creating small vibrations and movements in the camera. When this happens, there are a few things you can do to stabilize your tripod. What I did here was:
- Hang my camera bag from the tripod to add extra weight and attempt to stabilize it, and
- Spread the tripod legs very wide to create as much stability as possible.
That got me reasonably sharp pictures. Once back at the computer, I used a combination of Curves Adjustment Layers and Clarity (both the Lightroom slider and the Topaz plugin) to add more clarity to the buildings.
Blurred Water
Finally, I wanted the water to be blurred.
Ordinarily, to blur the water I would just put a 10-stop neutral density filter on the camera, which would slow the shutter speed down tremendously and create as much blur as I wanted. Here I didn’t want to do that though. Why not? Well, first of all I didn’t think I would need to do that to get a slow enough shutter speed. Frankly, I was using shutter speeds of .8, 2.5, and 8 seconds without the filter. I could have lowered my ISO to 100 and made my aperture a little smaller as well, if I really wanted to slow down the shutter speed. So I didn’t think I would need the filter.
You could make a good argument that I should have reduced the ISO to 100 and made the aperture slightly smaller. That would have made the shutter speed a bit slower and added more blur to the water. Why didn’t I do that? Because I was concerned about my camera and/or tripod moving during the exposure if I set the exposure too long. As mentioned above, it was very windy, and I was having to add additional support to the tripod. But maybe I should have.