

All pictures really boil down to 3 parts. Those parts are the subject, the background, and the foreground. All are important, and if any one are is not right, the picture will not turn out well. But these 3 parts are not of equal importance. Further, there is a particular order in which you should think about these different parts of the picture. The importance and the order of these parts to the picture are probably not what you think. In fact, it may be the opposite.
As beginning photographers, we seem to start out by concentrating entirely on the background. Essentially the background is the subject, and there is no foreground. Therefore, our 3 parts of the picture are jumbled into one part. The picture is just a snapshot.
After a while, however, this situation naturally improves. As we gain more experience, we start thinking more about the subject. At this stage, there is generally a nice background as well. Still, the foreground is often neglected.
As a result, our pictures – while much improved – still seem to be missing something. That missing something is usually a well-thought out foreground. But it is often very difficult for the photographer to take the next step and start focusing on the foreground. Whereas the transition to adding subjects to the picture seems to come naturally, the next step takes real effort. If you can achieve it, however, the result is that the picture is dramatically improved and it appears like a complete composition.
But as you are standing there with the camera up to your face, how do you go about placing these elements in the picture? Which part do you think about first? In other words, how do you compose the picture?
The answer is to compose your photos with a “back-to-front” approach. This is where you establish the background first, then place the subject, and finally concentrate on the foreground. It seems counter-intuitive, since it would seem that the subject should be the first thing you think about. However, it seems that my best pictures come from this approach. Further, the more I have listened to masters of photography, the more I find they use this approach constantly.
Therfore, in this article, I’ll describe the process and explain why it works. You might find that adopting it improves your compositions.
Step 1: Don’t Worry So Much About the Background
The background of your photo is the easy part. In fact, you have usually done 90% of the work to choose your background before you even picked up the camera. It is determined partially by your location. You have presumably gone to a scenic place you want to photograph. Odds are there will be a nice background to work with. Consider the following settings:
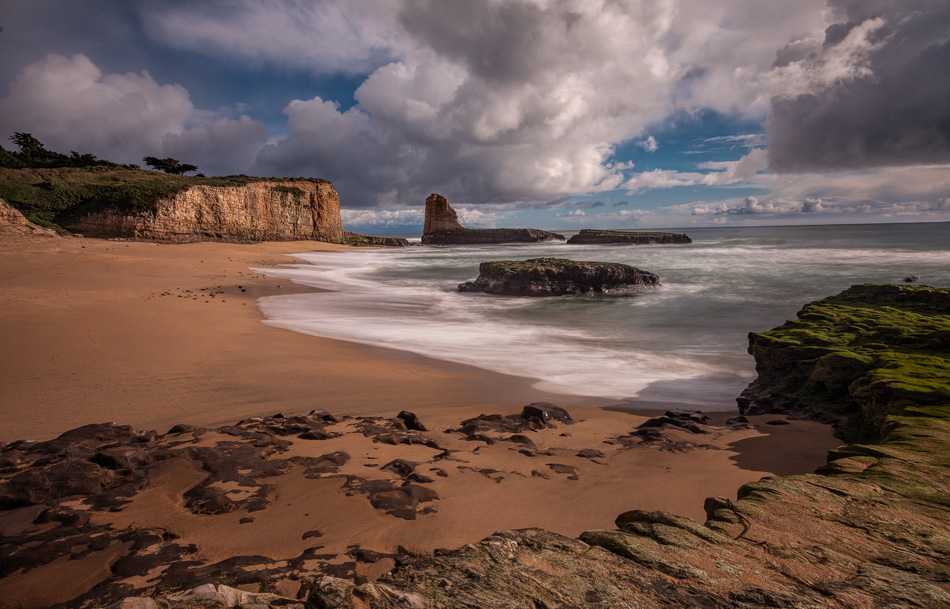
- Typical Landscape. Over half the time, the background of a landscape photo is the sky. If the background is not the sky, it is usually trees, although it could be mountains, water, or desert depending on your location. The point is that it is largely determined before you even picked up the camera. It is determined by your prior decision about where to go photograph.
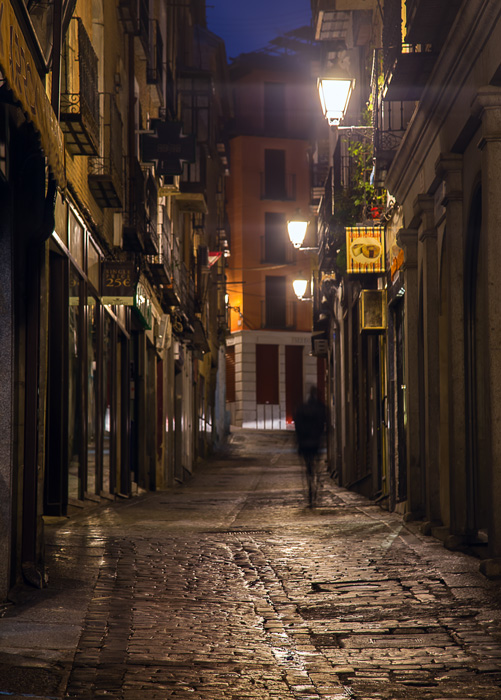
- Urban Setting. Where you are standing in an urban environment largely determines the background. It could be a wall, it could be a street view, or it could be an overlook. In any case, the place you went to take the picture largely determines the background.
That’s not to say, of course, that you have no control over the background. You do. You can move around to change the perspective or order of things. You can zoom in or out (with your lens or your feet) to exclude items from your picture. Although the location determines the background on a macro level, you control it on a micro level (these micro changes can have a big impact on your picture, so don’t let my use of the word micro diminish the importance of these smaller changes).
Going back to our landscape example, if your background is the sky (as it often is), you might be stuck with it, but you can shift your position, angle, or focal length to include more or less of it, and also to arrange any clouds within the picture. Using our urban example, you can often simply turn to use a different building or street as your background. Still, you will find the background will be pretty similar. You will not have urban decay in one direction and a paradise in the other.
That leads to another point about backgrounds. Setting up a background is intuitive even for beginning photographers. In fact, when we are just starting out, often it is all we are thinking about. We see a nice view and assume it must translate into a nice picture. Sometimes it does and sometimes it doesn’t, but the point is that the background is on our minds even when we aren’t expressly thinking about it. Further, even where you are just walking around with your camera, and are not in a place chosen specifically for photography, you will usually be attracted to the background first. It is usually what causes you to put the camera up to your face in the first place.
As a result, you should frankly spend very little time thinking about your backgrounds. Much of the work is done for you when you chose your location, and in any case your brain is automatically thinking about the background already. Often a second is all you need.
That said, the background is what you should think about first. Think of it as a base layer on your canvas. Knock it out and then move on to the next steps.
Step 2: Define the Subject (or the Middle Bit)
The next step in composing photographs is to define the subject. This one often isn’t that hard either.
Usually it doesn’t take long for a beginning photographer to realize that they need to focus on a subject. Instead of that grand scenic vista or city overlook taken with no real purpose, they will begin looking for a point or a center of interest. Sometimes it is a person. Other times it is a building or a tree. In any case, it is a definite object that anchors the photo. It gives it a purpose. It is what switches the photo from a snapshot to a composition.
Even where the subject is less concrete, it is still usually something you can readily understand. The subject might be something like a shadow or an implied leading line. These things, while not tangible things in the picture, still work as compositional elements that can provide a point to the picture. Other times you have to work at finding a subject. You have to find that center of interest in the grand scenic landscape photograph. You have to find that pattern or leading line. Anything can be a subject, but you have to have one.
The good news is that this is another part of photography that our brains understand readily. We know we need a subject. Very early on, we can just feel that the picture is wrong if there isn’t a subject. Therefore, while it does take some effort, it comes naturally. And once you make the connection, defining the subject doesn’t usually take a lot of time when you are photographing. You just know it.
At what part of the compositional process should you focus on the subject? Second. That is, after you have established the background, but before you start thinking about the foreground. Once you have your background set up, your canvas is ready for you to place the subject. You’ll have to find the subject first, and then place it within the frame. You will probably be thinking about things like perspective, the rule of thirds, leading lines, and other compositional elements. As a result, you should spend some time on this. A few test shots may even be in order.
Establishing the subject is obviously very important. I don’t want to diminish it. But once you get beyond that beginning stages of photography, I don’t find that the lack of a subject ruins many pictures. Therefore, it is not something you will spend a huge amount of time on.
Step 3: Concentrate on The Foreground!
We have now worked our way from the back of the photo (the background) through the middle (the subject) and are now at the front of the picture. This is where I find most photographers pay no attention. At the same time, I find that it is often what is holding their pictures back. When my own pictures fail, this is often the cause. A great foreground is often what turns a snapshot into a composition. You should spend well over half of your time concentrating on the bottom third of your picture.
The first step is creating a great foreground is actually spending some time thinking about it. Once you take that step though, how do you actually going about doing it? There are a lot of ways, obviously, but let me tell you a few things that may help you go about it. The key is to avoid a normal perspective. Taking a picture while standing at normal height is the kiss of death. You want to be at a different vantage point. Very often, the best way to make your foreground better is to get low to the ground (often getting right behind something) when you take the picture. This will cause the viewer to feel as though they can walk into the picture, and this will add interest to it.
Sometimes, getting higher than a normal perspective works as well. That is easier said than done. There isn’t always a higher vantage point, and we won’t always have a stepladder handy. In a pinch, attach your camera to your tripod of monopod and hold it up high over your head. Take the picture with a remote shutter release. It is quite imprecise, but it will keep you from using a normal vantage point.
Finally, don’t let your foreground be blurry. If you are using a wider aperture such that depth of field is an issue, set your focus point closer to you. A rule of thumb is to set the focus point 1/3 of the way into a picture. Faced with the choice of a blurred background or something blurry in the foreground, keep the foreground sharp.
Taking this final step will vastly improve your photos and will turn your picture into a true composition. But it isn’t easy. If you find yourself struggling with this aspect of composition, that is normal. Further, it isn’t something you learn once and then you’re done. You have to keep working at it.
Bonus Step 4: Compose, then Wait
Now your picture is composed. You have a nice background, a defined subject, and even a well thought out foreground. Are you done? Maybe. Most of the time, you will be. Other times, however, there is bonus material to be had.
Many world-class photographers add something else to their photographs. They compose a great static picture in the manner set forth above. They have the exposure they way they want. The composition is exact. Everything is dialed in. Then they wait.
And wait.
And wait until something happens. Maybe a person walks into the frame. Maybe some birds fly into your landscape shot. Who knows. But the point is that you sometimes obtain that magical special something. You can only get it by being ready, with the composition set beforehand. If you try to get up the composition and exposure while capturing a fleeting moment, you will be too slow and you will miss it.
Henri Cartier-Bresson was famous for this technique, and it shows. His pictures were all arranged really well. If you are familiar with Cartier-Bresson, you probably know him as the “decisive moment” guy, and that is very true. But before you can worry about decisive moments, according to Cartier-Bresson, you have to “get your geometry right.” By that he meant that you have to get the background composition set up the way you want. Look at his pictures and you will see that many of them would be interesting street shots even without the person or people in them. But he waited. And he shot. And he captured the decisive moment with the perfect composition already set up.
Therefore, once you have your shot set up the way you want it, take some time to see if something might happen. Of course, this works better in an urban setting where people and cars are moving around, rather than a still landscape. And we can’t all sit in one spot all day. Honestly, I often lack the patience for this approach, but it is a way the masters capture great photographs that are set up perfectly with that “lucky” perfectly timed extra element.
Composing Back to Front
There are essentially two ideas that I hope you will take away from this article:
- Set up your photos in 3 parts, working from back to front,
- Spend most of your time on the front part.
This is not just my own idea. Rather, this is how many great photographers work. The method forces you to set up your photos with care. It forces you to concentrate on the parts you might otherwise overlook. And it sets up your composition so you are ready if an extra element comes your way.
Give it a try and I think you will see immediate benefits. But remember to keep working at it. This process is not natural or intuitive for most of us.
This is an especially good article. We all know about fore- mid- and background elements. But thinking in terms of back to front in setting up the shot is really good. Thanks Jim.