

In a sense, there is nothing simpler than removing unwanted spots or small items from your photos using Photoshop. You just select the Spot Healing Brush, click on the spot, and presto – no more spot. It couldn’t be simpler.

But when you are shooting outdoors things can be messy and you will sometimes find yourself involved with more of a process than you anticipated. I am often surprised when I get home from a coast, sit in front of my computer, and find that there are 10-15 spots on my photo! And then you can find yourself removing other unwanted items from the picture as well.
So it pays to make sure that you are going about this right. Use these 5 steps to make sure everything is done in the best way possible.1. Start with a New Layer
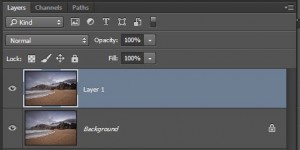
Start with a good foundation, and that means performing your your edits on a new layer.
If you are not familiar with layers, don’t worry, it is easy. The simplest way to create a new layer is just to press Ctrl+J on your keyboard. That will create a new layer and you can perform your edits on it.
The reason for creating a layer is that you can discard the layer if you decide you don’t like what you have done. Or you can add a layer mask and mask away an edit you have decided against including.
It might seem like a new layer is overkill for such a simple edit. But when you do these edits of spots, you will often decide to remove other items as well. There might be power lines. There might be some shoes in the sand. Or a person that shouldn’t be there. The point is that you will often end up with more of a process than you anticipated.
If you don’t use a layer, you are pretty much stuck with your changes. Sure, you could hit “undo” a bunch of times, but if you are trying to undo something you did 20 steps ago you are going to have problems.
So it is best to just get in the habit of pressing Ctrl+J before doing your edits. It will make your life easier.
2. Go at 100%
You need to be able to clearly see the any spots, and the best way to do that is to zoom in. How much, you may ask? There is no right answer, but try to zoom in to at least 100%.
If you submit photos to a stock agency, they review your photo for problems zoomed in at 100%. So obviously, if there is ever a chance that you might submit your photo to a stock agency, then you will want to have reviewed it at that level as well to avoid the risk of rejection.
But even if you do not plan to ever submit your photo to a stock agency, which will be the case for most of us, zooming in to this level makes sense. It is zoomed in far enough that any issues should be clear. And why not do it like the pros do it?
3. Add a temporary contrast boost.
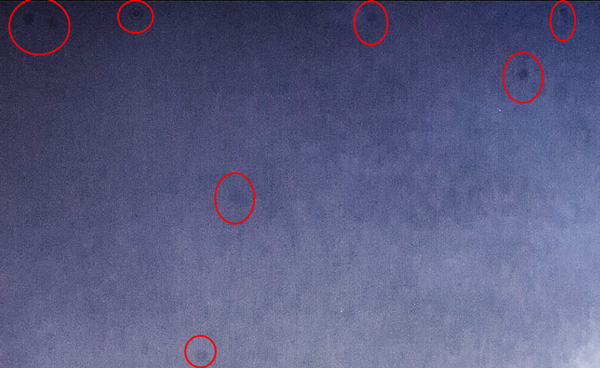
To make the spots clear, you can add a temporary contrast boost to your photo. That will make the lights lighter and the dark parts darker. Most issues with spots in photos tend to appear in the sky, so this will really make the spots stand out.
Use a curves adjustment layer to create this contrast. If you aren’t familiar with that, it is simple. Just go to “Layers” in the top menu, go to “New Adjustment Layer” and select “Curves.” On the histogram of the adjustment layer your have just created, drag the white point and black point a little bit toward the center of the histogram.
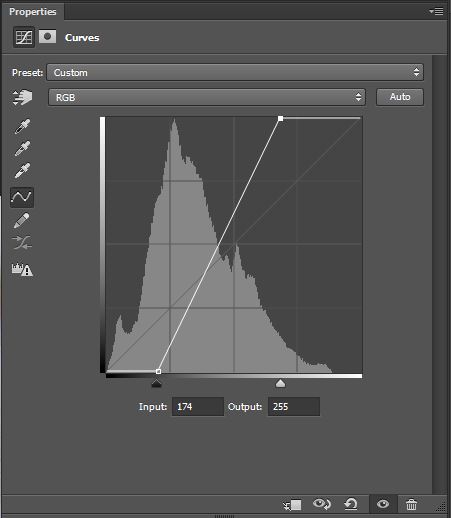
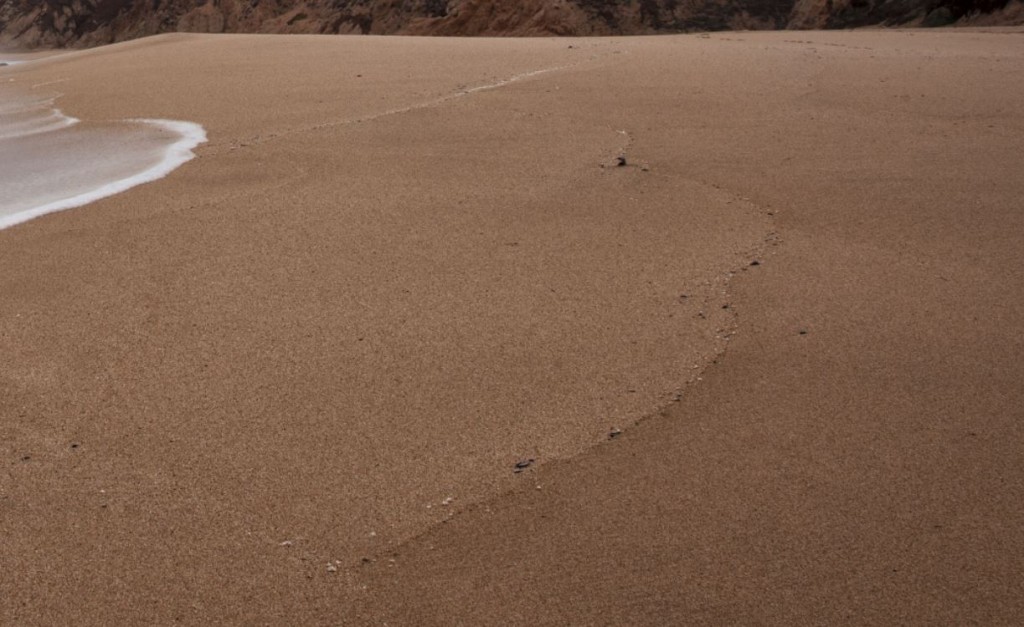
Your picture might look really bad as a result of this, but don’t worry – you can just delete the adjustment layer when you are done removing the spots. But all spots should now be crystal clear now. Go ahead and remove them. (Make sure you are working on the underlying layer and not the adjustment layer or nothing will happen). When you are done with your edits, just delete the curves adjustment layer.
4. Choose the Right Tool
There are three tools you will want to use when removing unwanted items from your photos. They are the Spot Healing Brush, the Healing Brush, and the Clone Stamp. Here is what they are and how they work:
Spot Healing Brush – This is essentially a fully automatic tool for removing spots and other small unwanted items. To use it, just select the tool and the cursor will be become a circle. Resize the circle up or down using the bracket keys on your keyboard ([ and ]). Then put the circle over the unwanted items, click the mouse button, and Photoshop removes the spot.
The upside is that it is totally simple to use. The downside is that you have no control over the process.
Healing Brush – This tool is the same as the Spot Healing Brush except that now you get to tell Photoshop where to sample pixels from in performing the edit. Doing that will involve one extra step. Start by selecting and resizing the tool as you did with the Spot Healing Brush. Now put your circle over the area you want to fix. Press Alt and move the circle to where you want to sample from and click the mouse button.
Just go back to the area you want to fix and click on it. Photoshop will sample from the area you selected by Alt-clicking to fix your photo.
If this is confusing at all, watch this video that walks through the process using Photoshop Elements (the process is exactly the same in Photoshop and Photoshop Elements):
A video from my Getting Started With Photoshop Elements series. This video covers the Healing Brush. Healing and Cloning work in exactly the same way in both Photoshop and Photoshop Elements.
Clone Stamp Tool – This is the manual way of fixing things, but don’t overlook it. It works the same way as the Healing Brush. You press Alt to tell Photoshop where to take the pixels from, and then when you click in the area you want to fix, Photoshop will replace the pixels with the ones you selected.
There are no algorithms involved – just straight up replacing of pixels. This is really handy when Photoshop gets confused in trying to use the Healing brushes (which often happens around hard edges). This is also the tool you will use for serious edits, like when you have to replace something complicated.
Another video from my Getting Started With Photoshop Elements series. This one covers the Clone Stamp tool.
5. When In Doubt, Clone it Out
Simplicity is the friend of the photographer. If you find your self looking at something and wondering if you should keep it in your picture or clone it out, usually cloning it out is the answer.
Oftentimes you will also find yourself wondering if spots in the frame were actually there or are spots on your lens or sensor. When in doubt, clone them out. The viewer will probably view them as sensor spots whether they are or not.
Conclusion
Healing and cloning are among the simpler things to do in Photoshop. But making sure you are doing them right with both make your life simpler and make your pictures look better.
Take your time with this step in your photo editing. Believe me, there is nothing worse than spending a lot of money on a large print only to notice a spot that you didn’t notice until you were staring at a 30×40 print. Your eye will immediately go to that one spot every time you look at the photo.
Follow these steps and you can avoid that.