
The Golden Gate Bridge is one of the most photographed structures in the world. In a sense, it needs no introduction, and you need no particular information to photograph it.
So why am I writing this article? Because there are some different angles and spots to photograph it from that are better than others. There is no one spot that you go to in order to get “the” iconic shot of it. Rather, there are a lot of different shots you can get from places that are miles away from each other. Further, time of day becomes an issue because you can photograph it from any side, so the sun will be a factor.
So let’s jump right in. We’ll start with a map of the area with the best locations for photographing the Golden Gate Bridge:
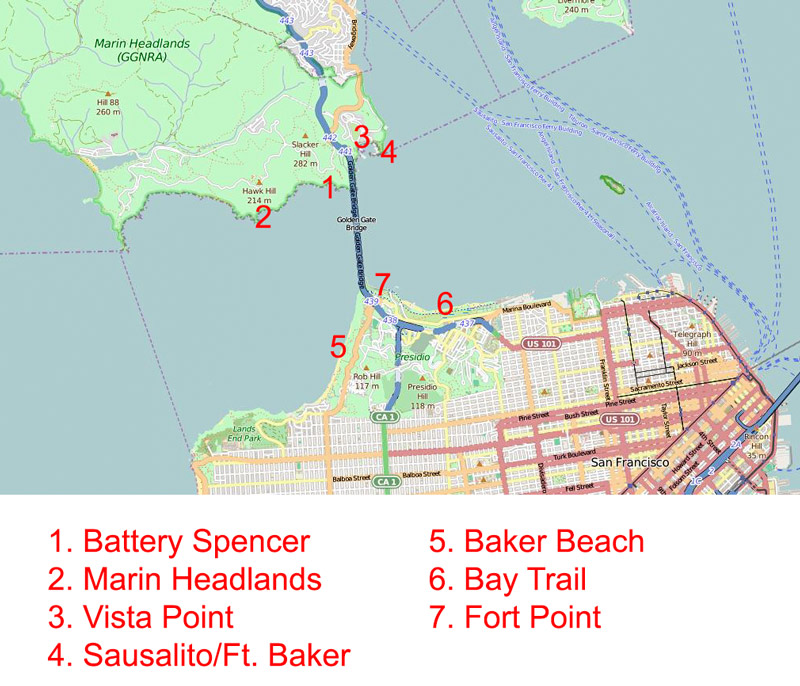
Now we will go through each of these locations. I’ll show you a shot I took from each location, give you the settings I used, and show you how to get there. Hopefully that will help when you are in the area, as you can pick the views you like best, go to that particular location, and then use what I’m showing you here to get even better shots.
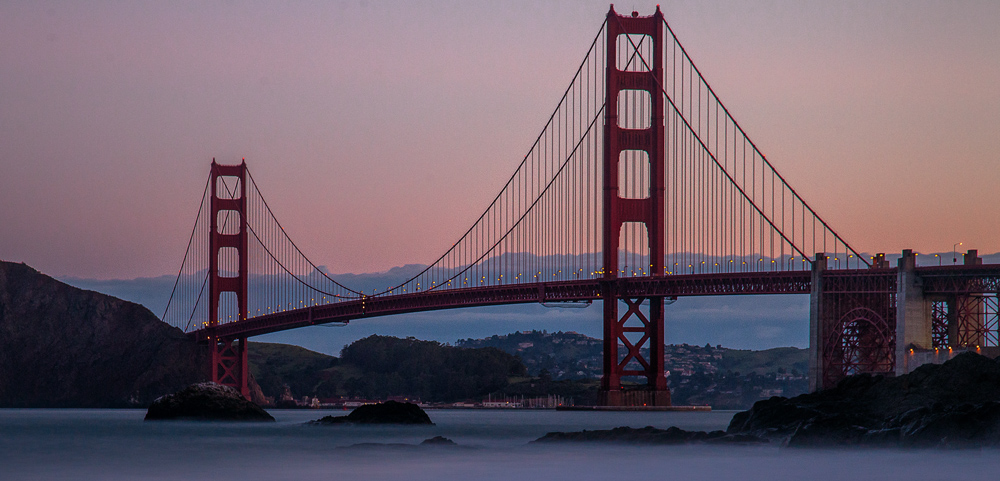
1. Battery Spencer
Battery Spencer is an overlook on the northwest side of the bridge just as you enter the Marin Headlands. It is open day or night, and there are many good times to go there.
Directions: Going north on 101 across the bridge, take the Alexander Ave. exit, which is 1/4 mile past the bridge. Turn left. The road will go under the highway that you just came off and then bend south. Just before it looks like the road is going to put you back on the highway, turn right (this is Conzelman Road, but there is no street sign). It will take you up the hill for about a half-mile and there will be a little parking lot on your left. Park here and take the trail to the overlook (it is not very far).
When to Go: Pretty much anytime is a good time to go. Since you are shooting to the east, sunrise can be a great time. I personally prefer evenings because you can catch the sunset and then get night shots as well. Even if the area is wrapped in fog, you can sometimes catch the top of the bridge peeking through.
Composition: There is no trick to this shot, and the only decision you really face is how much to zoom in or out. You can concentrate on the near pilon with San Francisco in the background, or you can try to capture the whole scene.
When you are at the overlook, there is a roped-off area from which you can shoot, although you will routinely see people go over the rope and walk toward the edges. Be careful, it can be quite windy up here!
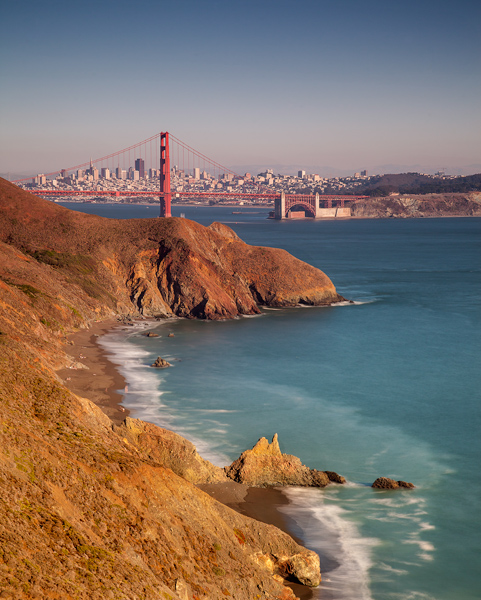
2. Marin Headlands
The Marin Headlands are the area to the northwest of the Golden Gate. The area is worth visiting even without the Golden Gate Bridge, as there are beaches, dramatic cliffs, and great views.
Directions: If you went to the Battery Spencer, you have already entered the Marin Headlands. When you are done with the Battery Spencer overlook, just get back in your car and continue on the road that you were already taking. You will wind around the coast and run into several overlooks. Basically, wherever you see a place to park, it will be for an overlook.
When to Go: Anytime. The weather is is quite fickle, and it is quite often grey and/or misty, so go whenever you see a break.
Composition: Your composition will largely depend on whether you are up on a vista or down on a beach, but either way it really comes down to the foreground. You have a great background and an awesome subject (the bridge), so the key is to find something to walk your viewer into the frame. It is easier said than done, especially if you are up on a vista.
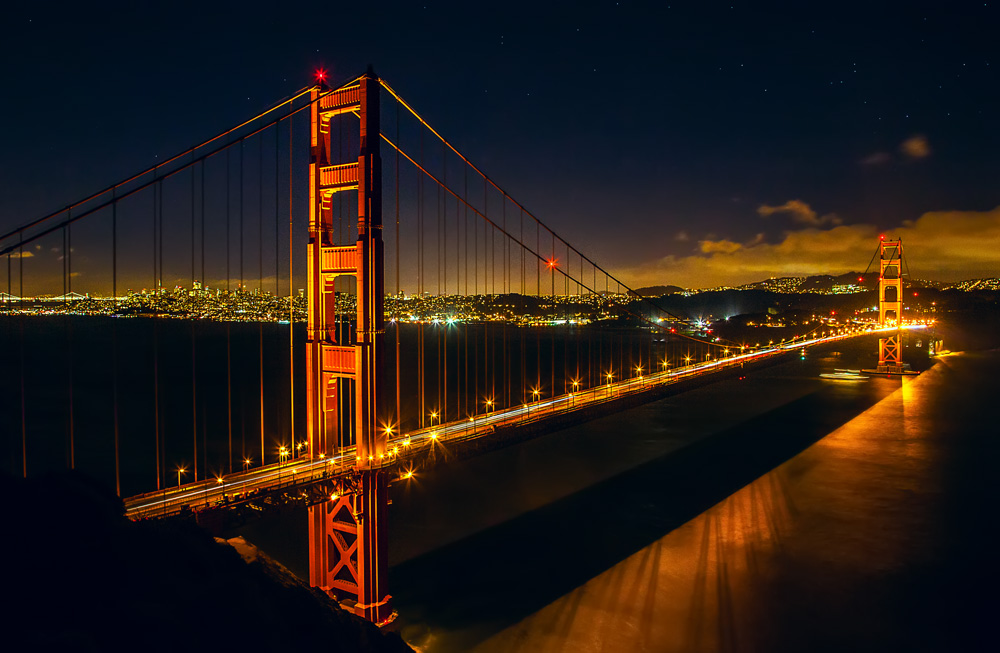
3. Vista Point
This is basically an established scenic overlook just to the north of the bridge. It is good for at least a quick shot, sometimes more.
Directions: Going north on 101 across the bridge, take the Vista Point exit, which is immediately north of the bridge. The exit will bend around into a parking lot. You’re here.
Head to the south wall. You are not supposed to cross the wall, but sometimes the shot demands it.
When to Go: I like to come here at night to get something different. If nothing else, you won’t be battling crowds at night.
Composition: There is a tendency to zoom in on the bridge from this point, which is fine. I like to use the path and rock below you as foreground elements.
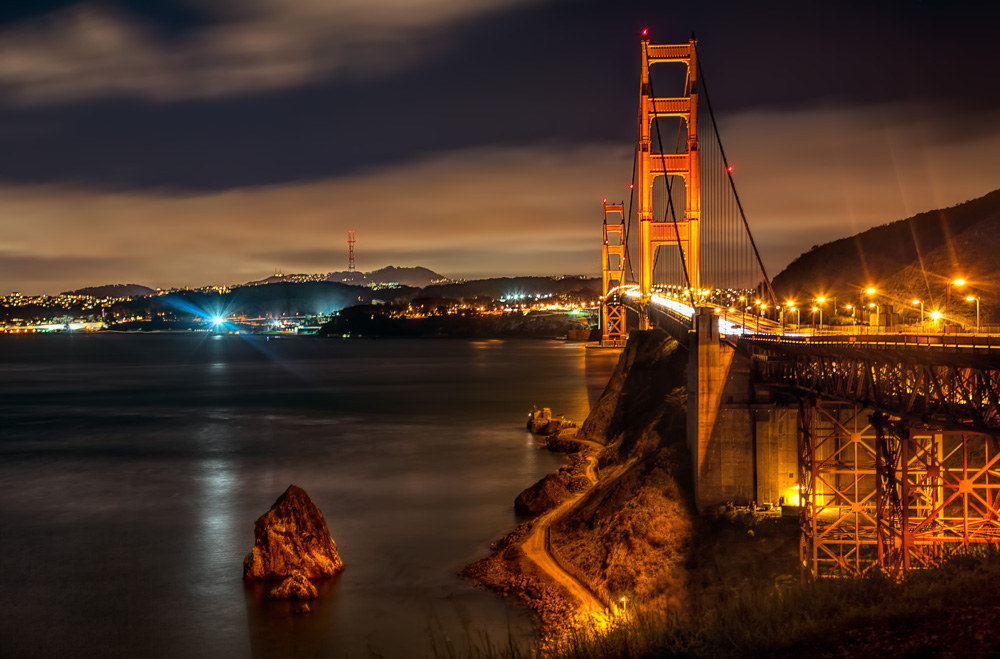
Sausalito/Fort Baker
Sausalito is the town just to the north of San Francisco across the bay. You can go through it to get to a spot that is near Fort Baker. It is basically underneath the Vista Point mentioned in the previous section to photograph the bridge. It can be tricky to get there, so note the directions.

Directions: From San Francisco cross the Golden Gate Bridge going north, and exit Alexander Ave. just as you would to go to the Marin Headlands, except that instead of going left, you will go right. You will head steadily downhill and in just about a quarter-mile there will be a left turn with a sign saying “Fort Baker.” Take that left. In just another quarter-mile, there will be a right turn also labeled “Fort Baker.” Take that right. Now just stay on this road, staying right wherever given a choice. It will take you through a little bluster of buildings called Fort Baker, and eventually onto a road called Moore Road that will take you out to a point with a view of the bridge.
When to Go: Anytime.
Composition: You have two big decisions here: (1) how much of the scene to take in, and (2) what to use as your foreground. You can either zoom in on the bridge or take in the whole scene, and there is no right answer to that. I prefer to try to use the foreground boulder in the shot, as shown above. Regardless, however, the foreground is a challenge. In the shot above, I used a 10-stop neutral density filter to slow down the water and use it as the foreground. Another approach is to use the rocks right in front of you (not shown in the picture above) as a foreground. While those rocks will give you a great foreground, I find that doing so make the bridge too small.
Baker Beach

Directions: This is a beach on the west side of San Francisco, just south of the bridge. It isn’t hard to find, but it is difficult to explain how to get there. Find Lincoln Boulevard, which runs on either side of 101, and take it south. You will see signs for Baker Beach, and you can pretty much just follow them. You will turn right on Bowley Street and then left on Gibson Road, which will run you right into a parking lot.
When to Go: Sunrise
Composition: The keys to this shot are (1) weather, and (2) foreground. For the weather, you’ll just have to take what you are given. The foreground is something you can control though.
Frankly, until I created this picture for this article, I considered every picture I ever took from this spot to be a failure. I do like this picture a lot actually. So what changed? What changed is that I got out my Crop tool and cut out a lot of the bottom of the picture so that the rocks appeared in the foreground of the picture. Previously there was a lot of water as the foreground, and it just didn’t work. I raise this for your consideration because when shooting from Baker Beach, I have two recommendations: (1) zoom in a bit, and (2) crop out the bottom portion of the picture you get.
Bay Trail
This is the path that runs along the bay from the marinas all the way to the bridge itself. There will be joggers and bicycles going up and down the path all hours of the day. This is perhaps the easiest shot to get since it is close to the other areas in San Francisco that you will likely be visiting.

Directions: You almost cannot miss it. From anywhere in San Francisco, just head to the bay. The path runs the entire shoreline.
When to Go: Sunset. You will be shooting toward the west, so the setting sun gives you the best chance of some drama in the sky.
Composition: I know I sound like a broken record, but this shot is all about the foreground. The subject is always the bridge and the background is always the hills and sky beyond it, so that just leaves the foreground. Ignore the example I provided above, and use the sand, rocks, or waves as the foreground element.
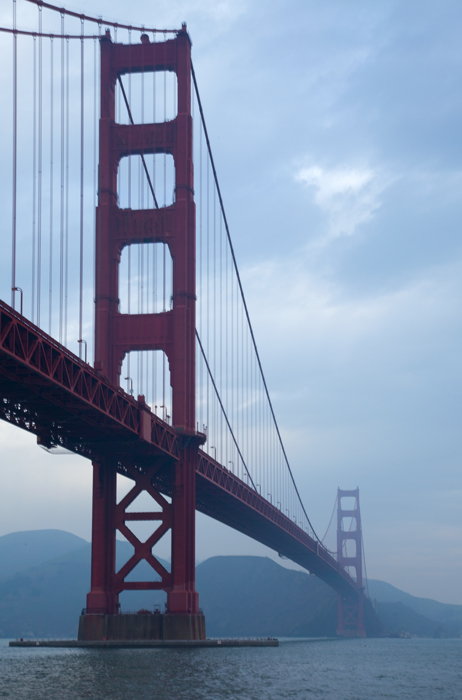
Fort Point
If you follow the Bay Trail toward the bridge, you will reach Fort Point at the base of the bridge. This is a good spot from which to shoot details of the bridge.
Directions: Just take the Bay Trail toward the bridge until you reach it.
When to Go: Anytime.
Composition: This is a good spot from which to get details of the bridge. It is also perhaps the best spot to get abstracts and pictures of the bridge from an architectural perspective.