
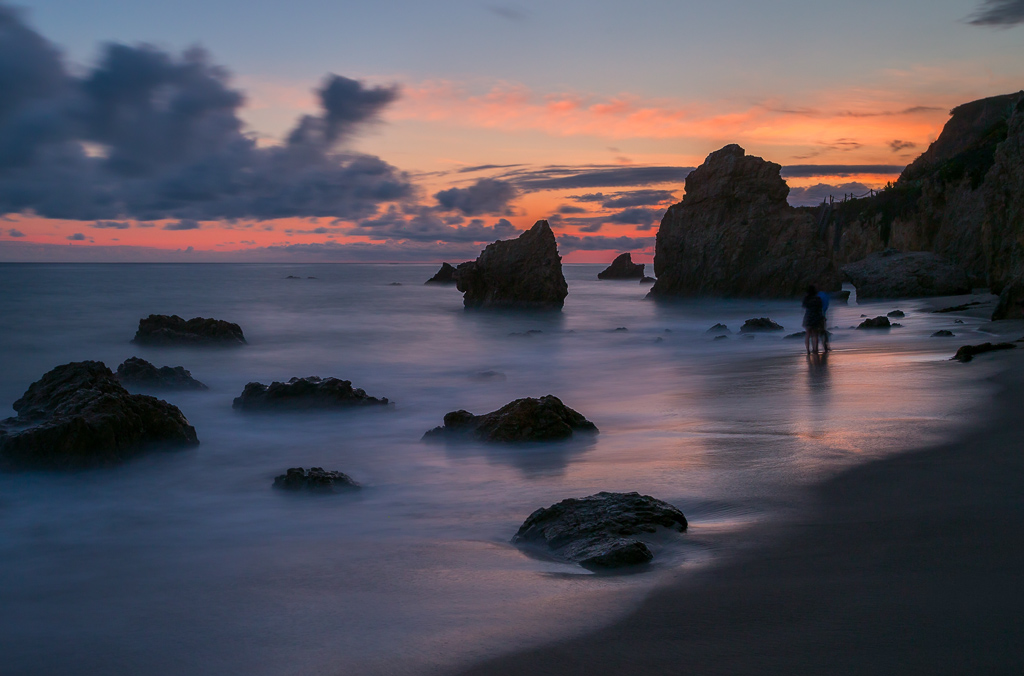
A beach with nothing but sand is boring. For coastal photography, you want something with some interesting features, like large rocks and boulders. That will provide your pictures with some sort of subject or center of interest. I found such a beach with all sorts of great rock features. It is called El Matador State Beach and it is in Malibu, California.
Why Go There?
Finding coastal access in California isn’t as easy as you might think. You are often up on a bluff overlooking the ocean. That makes for a nice view, but usually not great pictures. When you can get access to the coast, it is usually a flat, sandy beach. That’s great for most people, but not photographers.
El Matador is a rare gem along the coast that gives you access to a really interesting place that isn’t just a bunch of sand. It has everything from medium sized rocks in the sand, to huge monolithic rocks towering out of the water. You will not want for subject matter here.

Getting There
El Matador Beach is in Malibu, which is about 30 miles northwest of Los Angeles, along the coast. It is only about 30 miles from LAX, but it will take you a good hour to get there given LA traffic. Here’s the location:
There is a parking lot at the top that charges $8 (you pay a machine that takes debit and credit cards). From there, face the ocean and look to your left. You will see a trail, which you will take until you reach some stairs. The trail is a little steep and rutted so be careful.
When to Go?
When you go to El Matador State Beach, try to go a little before sunset. The best light is at sunset and a little bit afterward. Getting there a little bit earlier than that will allow you to walk around, get a sense of the place, and set up your shots.
Why not go at sunrise? Well, you can, but you will find it difficult to get in. This location is a state park and it does not open until 8:00 am, which will be well after sunrise. The gate at the entrance will be blocked off until 8. Of course, you could park nearby, walk around the gate and get down to the beach, but the trouble is that there really isn’t a good place to park.
You may be stuck with sunset, which isn’t so bad. During the summer months, the sun will go down to your right as you face the water. You can shoot sunsets with the rocks and beach in the foreground. More toward the winter months, the sun will set a little more out to sea.
Beware the Tides
Speaking of times to go, be sure you pay close attention to the tides. El Matador Beach is a stretch of sand that is backstopped by rock cliffs. When the tide comes up, it will reach the cliffs. It is possible to get stuck down there. In fact, that nearly happened to me on my first visit. I had to time the waves and run between certain spots in order to get back to the stairs. That’s not the best idea when you have a few thousand dollars worth of camera equipment with you.
What to Bring
Don’t do what I did the first time I was there: wear jeans and tennis shoes. You will end up soaked and sandy from the waist down. In fact, a local photographer took one look at me and said “You’re not from around here, are you?” He recommended wearing shorts and flip flops in the future, even if it is cold (which I did the next time I was there, and it worked much better).
Moving on to photography, you’ll need to bring your camera, a wide angle lens, a tripod, remote shutter release, and any neutral density filters you might have (that includes a Grad ND as well). This is pretty standard coastal photography equipment.

Getting the Shot(s)
There are so many different shots, angles, and compositional elements to use here that I cannot possibly cover them all. That’s part of the beauty of this beach.
An immediate question is whether and when to use a tripod. Whenever possible, use it. For extremely long exposures, you have no choice. Even for shorter exposure times, it is a good idea. The problem is that using the tripod really hampers your mobility and ability to get certain shots. You may be dodging waves or timing them.
Another immediate issue will be exposure. I won’t go into that here since I have covered aspects of exposure elsewhere (check out my Exposure page for a listing of such articles). You will be using a lot of longer exposures. If you are not comfortable using long exposures and neutral density filters, check out my article on Getting Started with Long Exposure Photography.
Now you are ready to think about composition. Here are some ideas to try out when you are there (and you’ll recognize some of these from the pictures above):
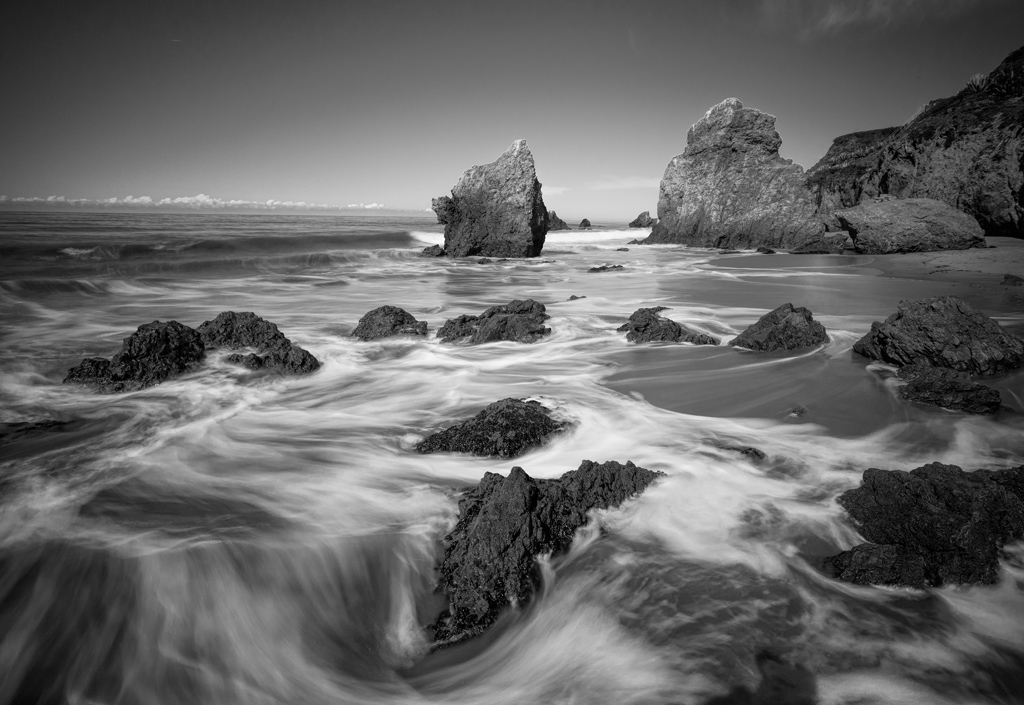
1. Start with some broad coastal shots with a hint of movement in the water. Think of this as your “establishing shot.” For this shot, use a shutter speed between 1/8 – 1/2 of a second. During times of low light, you will be able to use a shutter speed in this range by using a small aperture and low iso. In the middle of the day, you will probably need a three stop or six stop neutral density filter.
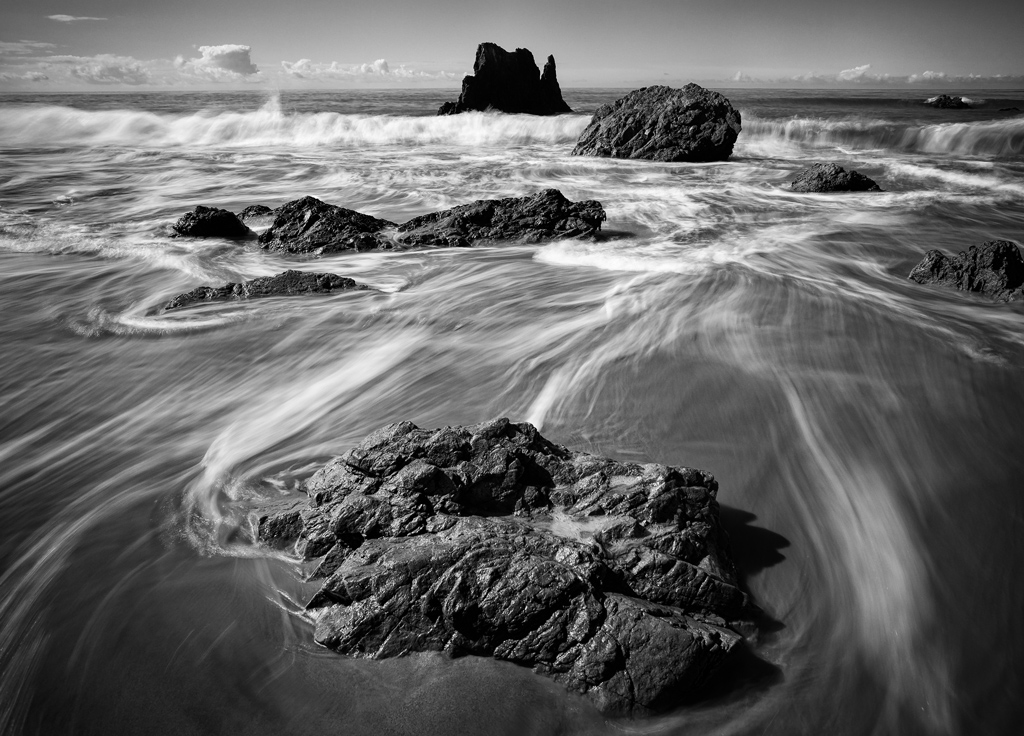
2. Create lines in the water. To do this, slow the shutter speed down to between 1/4 second – 1 second. It will create leading lines in your picture to add interest and guide the viewer’s eye. Often, you won’t see the line until after you have taken the shot. Don’t be afraid to experiment. You will likely need a mild to moderate neutral density filter for this shot.
3. The calm and serene scene. To completely blur out the water and create a serene mood, use a shutter speed of at least 15 seconds, preferably more. You may need to go into Bulb mode and use exposures longer than 30 seconds. Obviously, you will need a tripod for the shot. Unless it is getting dark, you will probably need a 10 stop neutral density filter.
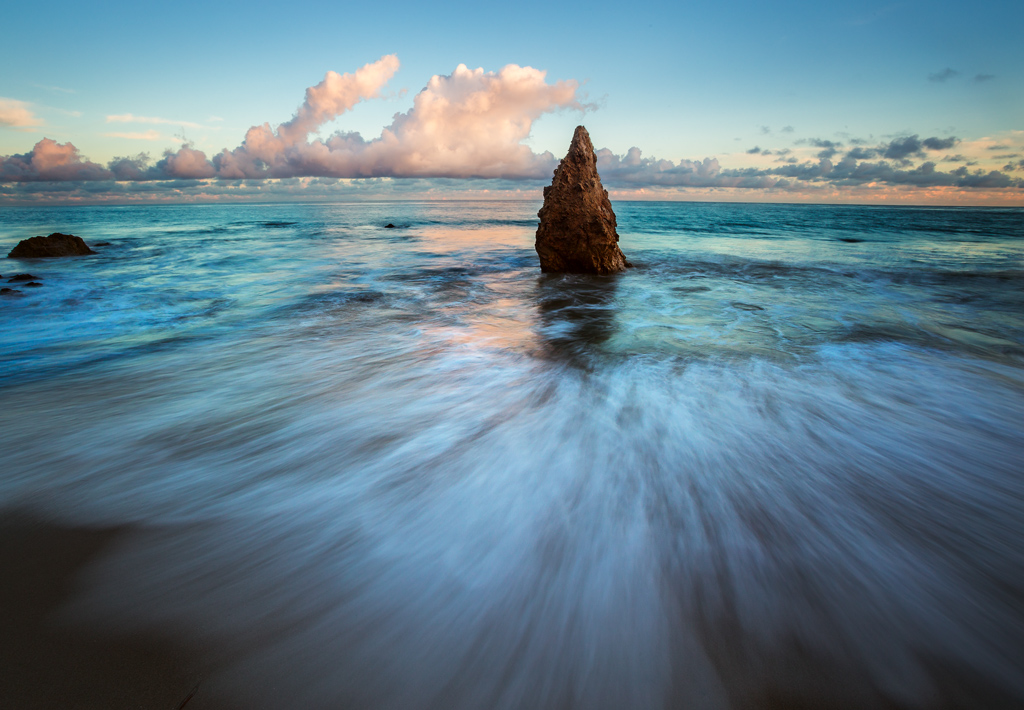
4. Another fun shot is to focus on one large rock with the water moving around it. This is often difficult to do with the tripod, so you may need to try your luck shooting hand held.
5. The reflection shot. Wet sand can create reflections to add foreground interest to your pictures. Wait for a wave exhaust itself. It will leave a blanket of smooth, wet sand. Use a tripod whenever possible (but it can be tricky since you are timing the waves).
Don’t forget about using a graduated neutral density filter as well. They are custom made for coastlines where you have a flat horizon line. If your sky is significantly darker than the foreground, it will even the exposure out for you. You may find yourself attaching the graduated neutral density filter to a neutral density filter to both slow down the shutter speed and even out the exposure.