
You shoot in manual mode. You know in general how the camera meters light. You know in general how the metering modes work, including spot-metering. You understand all of that, but still the question arises:
how exactly should you go about metering a scene and setting the proper exposure?
In this article I will show you a method for both (a) setting proper exposure and (b) making sure as much of your picture as possible is within the dynamic range of your camera. It is not the only method you can use, but it is the one I consistently see used by people who have really mastered their camera. I think it will get you the best results.
The Basic Method of Spot-Metering
The first thing you’re going to do is set your camera to “spot-metering” mode. To refresh your recollection, spot metering is where the camera measures light based on one single spot in the middle of your camera’s field of view.
The downside of spot metering is that if you meter on a bright portion of the picture and there are dark areas in the picture then you could have an improper exposure. However, to combat this, what we are going to do is take multiple readings.
That sounds like it will be complicated and take a long time, but it will not. Here’s how:
Step 1: Meter Based on Light Areas
First aim the center of your camera towards the brightest area in your frame. If there are specular highlights, ignore those. Just worry about the brightest area of your frame that you want to keep from blowing out (turning white).
Once you are aimed at the bright area, take an exposure reading, either by pressing the shutter button halfway down or pressing the button on the back if you are using back button focus). Now you have an exposure reading based on the brightest portion of your picture.
Finally, you will set your camera’s level of exposure based on that point. Here’s how:
- If your metered point is not terribly bright, or is a mid-tone, just set the exposure in the middle of the scale at “0.”
- If you are reading something bright, like a sky, set the exposure meter at +1.
- If you are reading on something really, really bright, bordering on white, set the exposure over +1, closer to +2 (but not all the way at +2).
What you’re doing is making sure that the bright parts of the picture are accurately set and that they are within the dynamic range of your camera. By putting these areas on the “plus” side of the meter, you are ensuring that they actually appear bright in the picture. By keeping these areas on the scale, you are ensuring that the bright portions are not “blown out.” If you were to just meter off of anything in the picture, the bright portions of your picture would likely be pure white.
Step 2: Check Your Shadows
Now you need to make sure that the darker portions of your picture look good as well. To do that, you will essentially do the same thing as you did in the process we just went through, but you will do it in a darker part of the picture. It will be the exact same process of
- first, aiming at the dark area, and
- second, taking an exposure reading of that dark area.
What you’re doing here is making sure that your dark parts of the picture are still within the dynamic range after the exposure setting you just made.
So go ahead and meter on a dark portion of your view. Is the meter showing that this area is still on the scale? If so, you’re all set and you’re ready to take the picture. In other words, if your exposure reading taken from the dark area of your picture is greater than -2, then you are all set.
But if your dark areas are not within the camera’s dynamic range (i.e. the reading is less than -2 or it is blinking) you may need to make an adjustment. To do so, just increase the exposure slightly until your dark areas are slightly above -2. That will keep the shadows from going to pure black and will put them within the dynamic range of the camera.
Of course, increasing the exposure in this manner might mean that you now have a problem on the brightness side of the frame. Keep metering back-and-forth to see if you can keep everything within the dynamic range. If you can, great. If you cannot, then you need to decide which are more important to you and take the picture with that in mind.
I should mention that there are other ways you could keep the brightness values in front of you within your camera’s dynamic range. For example, you could always use a graduated neutral density filter to darken the lighest portion of the frame, or else bracket the pictures and either blend the exposure or use HDR software. But those are topics for another day. Today, we are trying to get it all done in one shot.
Step 3: Check Your Exposure
At any time in this process, you can take a test shot. In fact, that is preferable. Go ahead and take a test shot at any chance you get.
Once you do so, look at the LCD to get a general sense of exposure. Of course, checking exposure based on the LCD will get you mocked in most photography circles. You will be told that the more accurate way of checking exposure is by looking at the histogram, and that is true, so be sure to do that too. But the LCD will give you a nice general sense of how you are doing.
So the overall method to use in setting your exposure is basically the following three steps:
- Set your exposure based on the bright part of your picture.
- Check to see if your shadows are within the dynamic range and if not make an adjustment.
- If possible, take a test shot and check your work using the LCD and the histogram.
As you perform this operation over and over, you will get to the point that you can accomplish this in just a couple seconds.
Applying What You’ve Learned
Hopefully you feel like you’ve got the system down. To make sure, let’s apply this method to some standard scenes you might encounter in outdoor photography.
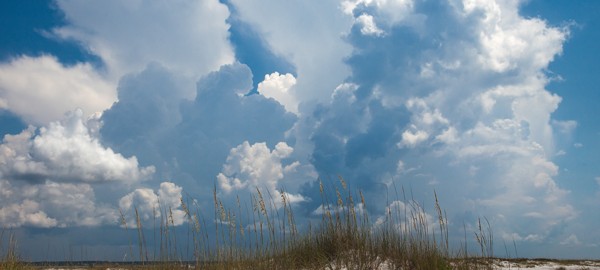
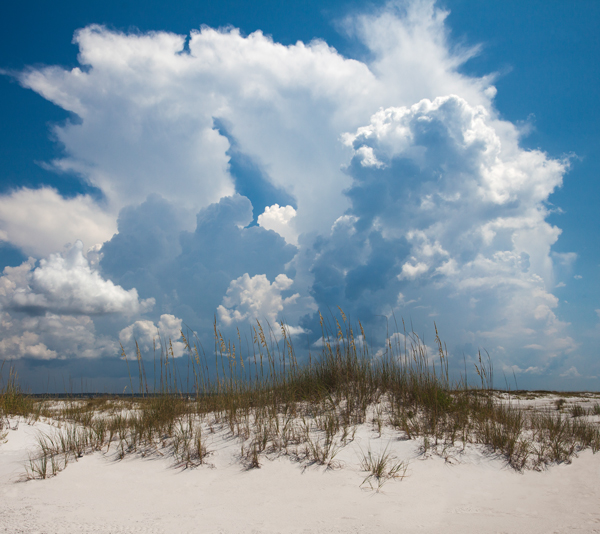
Landscapes
Let’s start with the standard sunny day landscape picture.
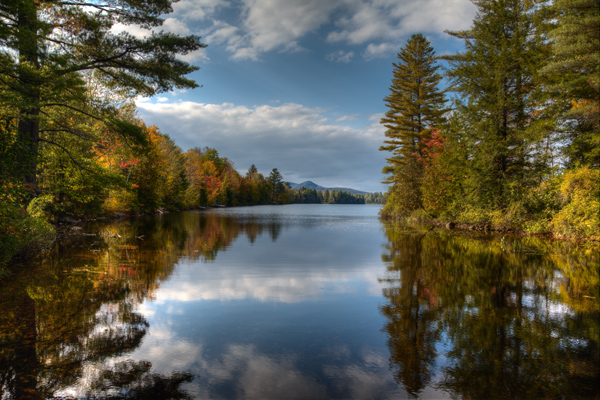
In that case, meter the light from the sky, which will almost always be the brightest part of the picture. Normally I would start by putting the sky at about +1 on my camera’s meter.
Next, check the foreground and see if it is within the dynamic range of your camera. If it is, great and you are done. Take a shot.
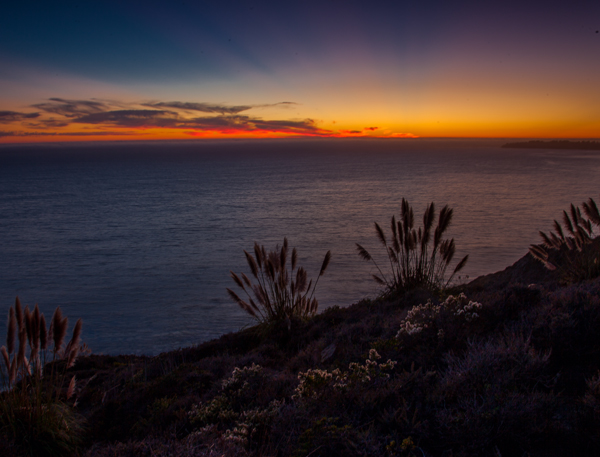
But if the foreground is at -2 or worse, see if you can increase the exposure slightly to keep everything within the camera’s dynamic range. This is usually achievable near dawn or sunset. It will also typically work out on a cloudy day. However, you may have a problem in the middle of a bright, sunny day.
If so, decide which part of the picture is most important to you and expose based on that.
Night Shots
Another typical outdoor photography shot that you will encounter is the urban night shot.
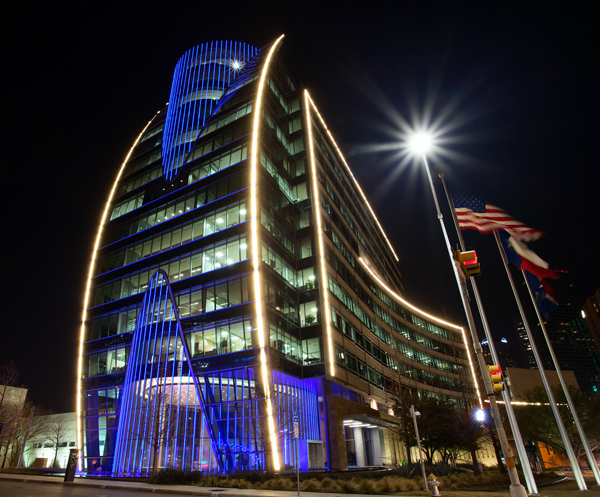
This is tricky because you have very bright highlights in the picture, along with very dark shadows/dark areas. In this context, the bright areas of the scene are almost always the more important ones.
To start off, we will, as usual, meter the bright areas. Put them at least +1.
Arguably, in this context, you are already done. You will rarely care much if the dark areas of your pictures are within the dynamic range of the camera. It is a night shot, after all, and there are supposed to be black areas. So, pretty much regardless of how your dark areas meter, go ahead and take a test shot.
But if you want to, go ahead and meter the dark areas too and see how things look. Again, don’t worry too much about the dark areas though.
Conclusion
I have seen this method used by most serious and/or professional photographers I have watched. This is the method I personally use. If you aren’t already using it, this method might take a little getting used to, but once you get used to it I think you will find it is the best way of controlling exposure in your photos.
Try it and let me know how it goes.
Before the histogram came along this was a great method and still is. Now I use the matrix or evaluative along with the histogram to make sure I have exposed correctly to the right/left and not blowing out either. Your comments.
Great comment, and in some respects I think that is the way to go. I think the main benefit is that it is faster. You just let the camera do the work and then check it on the histogram, If the camera got it right (and it will much of the time), you are done. If not, you just make a quick adjustment and take another picture. So that is a really good point.
The benefit of the method described in this article is that it gives you a little more control. Proper exposure isn’t just a function of getting it within the camera’s dynamic range, but also putting things at the exact exposure value you want. Of course, you could argue that you get to the same place using evaluative/matrix mode because either the camera gets it “right” or you make a quick adjustment and re-shoot. So I think it comes down to whether you value speed or control. That’s not to say you don’t have control using the evaluative/matrix method, and it is not to say you cannot move quickly using spot metering either. But I think those are the primary benefits of each.
Jim, Thanks for the article. I am feeling this as a completely new way of metering. This article gave me chance to re-look into the concept of Dynamic Range of my camera and I never knew that the scale displayed is itself the dynamic range of my camera (Please correct me If am wrong in understanding this).
Well, the doubt which strikes my mind immediately is lot of Photographers I have met (Mostly Semi-Professionals) advised me to capture with one low stop of exposure, so that I can contain the detail from being blown out. But your article says otherway that +1 stop of exposure is better way of capturing. Please let me know you thoughts on this.
Jim, That’s a wonderful article on the topic which has opened up a new and refreshing way to look at shooting beautiful shots. However, have’nt you missed something else also to look into during the whole process of adjusting metering ?!! How about setting proper ” White Balance “??
Please comment about setting custom white balance technique whether White or Gray card and how to go about it relevant to the topic we are discussing. Ashok Sood
White balance is really only relevant if you are shooting in jpeg. If you have white or gray cards with you to set the white balance it is highly likely that you have a camera that can shoot in RAW and should really be use that mode, as is discussed on this site, the RAW files have a larger dynamic range and will capture more of the scene.