

“When it comes to tripods, you want one that is stable, light-weight, and inexpensive. You can have any two of these characteristics you want, but never all three.”
Besides the camera and lens, the tripod is probably the most significant expenditure you will face in photography.
Because of the different ways that people shoot, and the different ways that people travel, there’s no way to simply recommend one particular tripod. Therefore, I am presenting this as a series of tips to help you pick the best one for you.
1. Get it right the first time
If you are someone that reads a lot of books, magazines, and blogs about photography, you will know that there are some standard things that most people say about the purchase of a tripod. The standard mantra goes something like this:
- If you buy an inexpensive tripod, you will be unhappy and will soon be in the market for a new one.
- Most photographers go through a series of tripods before settling on the best and most expensive one available, so you might as well start off by doing that.
- Therefore, I recommend (not really, this is just the standard advice I hear) that you buy something like a tripod from Really Right Stuff or perhaps a Gitzo. The total cost of such tripods will be between $1000 and $2000.
If you have that kind of money to throw at this project, I do not quarrel with this logic. I have never heard of anyone that was unhappy with one of these tripod setups.
I will confess that spending this kind of money on a tripod is just not for me. I feel like I can get what I want for a fraction of this cost. But since it appears to be conventional wisdom, I want to at least make you aware of this philosophy.
2. Buy multiple tripods
For me, there is really no one right answer when it comes to tripods. For example, the tripod I want when I am walking around a city taking photos is markedly different than the one I want if I am traveling via car and photographing landscapes. In the former case the size and weight are paramount considerations, while in the latter they matter little.
So, unless you do a single type of photography, you may find yourself wanting a different tripod for different situations. This approach is contrary to “buy one really expensive tripod” approach above, and frankly the one that I subscribe to.
I personally own a larger tripod for times I am driving around or won’t be walking much. I have another smaller tripod for days when I will be walking around all day. I could see hikers wanting a really small tripod. I could see those who do some studio work wanting a big, heavy tripod.
The point is: get what suits your needs. And if you have multiple needs, get multiple tripods.
3. Buy from a camera store
If there is one item you are going to want to have in your hands and play with before purchasing, it is a tripod. How much you like a given tripod depends very much on feel and how comfortable you are with the system for extending the legs and manipulating the head. If you have a good local camera store, go there and play with the tripods for a while. It will be time well spent.
In addition, this might sound like complete lunacy, but if it all possible I recommend that you visit the B&H Superstore in New York City prior to purchasing your tripod. Most other camera stores are likely to have somewhere between 10 and 25 different models of tripod. B&H will have rows and rows of tripods available. I cannot remember how many they had, but it seems like there are hundreds of them. You can spend half a day perusing them. Every tripod you have ever heard of will be there on display. So, if you have any reason to be in New York, get by the B&H store. Plus, if you haven’t been there, I guarantee the store is unlike anything you have ever seen.
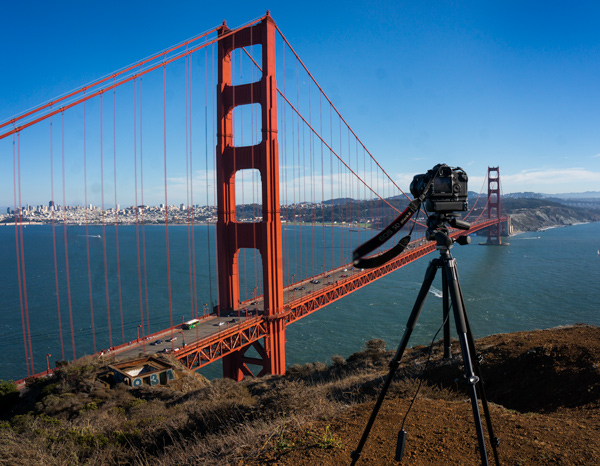
4. Pay special attention to the height
Pay special attention to the height of the tripod. Many cheaper ones are not very tall. One thing I can definitely say is that you do not want to be hunched over looking through the LCD of your tripod. Extending the middle column is a no-no, so do not rely on that.
5. Pay special attention to the leg locks
You are going to spend a lot of time extending and folding up your tripods legs. You will obviously start and end every set-up with this action. Further, when you are out shooting, a lot of times you set up, take a few shots shots, now fold it back up and walk a little more, set up again, shoot some more, now move again, set up, shoot, and so on. You may open and close the tripod’s legs dozens of times. And then you will want to make adjustments while you are at the same location. Often you may want to take a shot at eye level, but then want to get down behind something for a different shot.
The point is that you will be opening and closing these things a lot. So it pays to make sure you are comfortable with the legs’ locking mechanism. There are many different types of locking mechanisms, and different people are more comfortable with different types. You will just need to play around with them and see how you like them.
6. Consider your planned use
Think about what you will be using your tripod for. If you plan on doing 30 minute exposures of star trails, then you definitely should be looking at some really expensive and very stable tripods. But if you are just looking for the extra stability and sharpness from exposures that are slightly too long to hand-hold, you don’t need such a beast.
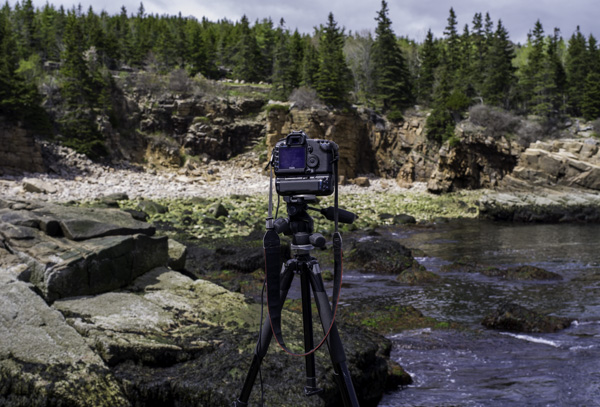
For example, I recently read a book by a photographer that does almost exclusively coastal photography. Almost all of his shots are obtained by using a wide angle lens, getting low to the ground and using a shutter speed that it is only moderately slow (usually around 1/4 of the second). When discussing tripods in his book, this author scoffed at the idea of using a big, heavy, expensive tripod. He had no use for it given his style. Also, since he routinely shoots low to the ground, the notion of making sure the tripod was tall enough was absurdity to him. Light, relatively inexpensive tripods work just fine for this photographer.
The point is, if you have an idea of the type of photography you will be doing, tailor your tripod towards that.
7. Consider camera size
Cameras are getting smaller, not bigger. The mirrorless revolution is upon us. Therefore, it might be that you don’t need as much of a tripod as you previously did.
The was recently brought home to me when I was on a hike where I had not brought my tripod because it would have been too heavy. After hiking several miles, I came across a couple of women who were photographing, one of whom had a mirrorless camera. She had a cheap plastic tripod with her. Because it was so small and cheap, the tripod weighed next to nothing. The fact that it was cheap and plastic did not matter since it was only holding up a small camera and lens. So she got to use a tripod and I didn’t.
It doesn’t take much to hold up a mirrorless camera and lens, so if that is what you have then look at smaller or cheaper options. On the other hand, a big DSLR with a long telephoto lens will require a large amount of support. So consider how much weight and stress you will be exerting on your tripod before deciding on a particular model.
8. Avoid Very Cheap Tripods
In this article, I have talked a bit about inexpensive tripods. By that I mean tripods as low as the $100 – $150 range. These will often work just fine for you, depending on how you are using the tripod.
But, unless you have a light camera and lens setup, steer clear of very cheap tripods. If you are looking at a tripod at Best Buy or another big-box store, be wary. If you are looking at a tripod that cost under $100, be wary.
I’m all for avoiding unnecessary expenditure, but there is a limit to how low you can go with tripods. You reach a point where they are not capable of supporting your camera and in any case will not last very long.
A Strategy for Purchasing
So those are my promised 8 tips for purchasing a tripod. But in addition to those tips, I want to leave you with a possible strategy for purchasing a tripod.
My premise is that you want to buy a tripod, but you don’t know exactly what you want or what you will use it for. You want to get a reasonably good one, but don’t want to break the bank doing so.
So here’s a potential strategy: Buy a lighter, inexpensive tripod first. Buying such a tripod will get you into the game and it won’t break the bank. You can then get comfortable using tripods. Take it out and use it several times. As you do so, you will find out more and more about what you really want and need. You will develop a sense of what controls work for you and what don’t. You will determine how much of a tolerance you have for weight.
In short, by using a tripod you will get to know what you really want. You might not ever want anything more than what you already bought. If so, great! You have saved a lot of money compared to someone that ran out and spent $1500 on a tripod.
But if you do decide you want something different (and odds are you will), because you bought a lighter tripod, you can use this tripod as your travel or walking-around tripod. Your original small and light tripod should serve that purpose well. That way, even though you are now going out and buying a new tripod, your prior purchase won’t have been a waste.
I started with a Vivitar tripod that cost $10 shipped. It’s thinnest legs were thinner than a #2 lead pencil…really! I have a GE X500 Bridge camera that don’t weigh a pound, but it made this tripod dance….and I used it for over a year with no real problems, both insoide and out. I bought a used Dolica mid range tripod, and it is WAY too much for this camera, but it is rock solid for sure.
I will be sticking with the Dolica line because when this used tripod needed a part they sent it out, no questions asked….now THAT is costumer service, and that means a LOT in today’s world.IMHO.
That’s good to know. Thanks!
What about the connection of the camera to the tripod? Are the “screw ins” really safe? I always have the feeling that they could come loose.
I believe they are. I have never experienced a problem with one. There is enough thread that it would have to do multiple revolutions to come loose.