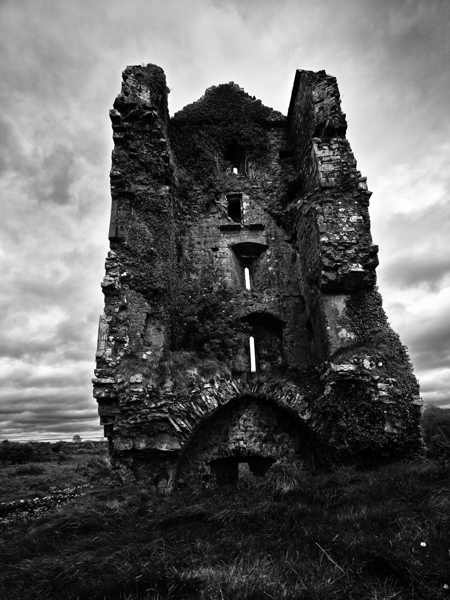
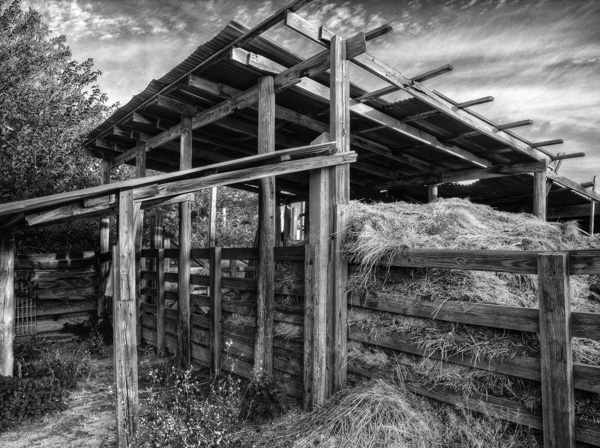
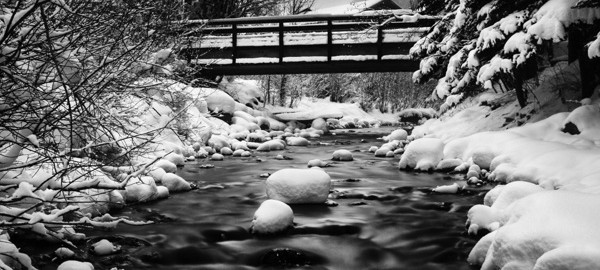
 Some people love black and white photography, and they take all their pictures as black and whites. For many others, however, it is an often overlooked advantage of digital photography. You can make any color picture you want into a black and white. In the film days, you were stuck with whatever sort of film you had in your camera, but now, you can change it.
Many find that when they do convert their photos to black and white, they do not look very good. Frequently the photos are dull or flat. So I want to offer you some tips so that you can have confidence that you are converting your photos to black and white in the best possible ways and that you are optimizing your photos for presentation in that format.
Before we get started, you might want to check out this video that shows you exactly how to convert your photos to black and white. This will show you exactly how to convert your photos to black and white. Once you understand that, here are some additional do’s and don’t’s for you to use:
Taking Black and White Photographs in the Field
In digital photography, you have the option of taking a black and white photo, as opposed to converting a color photo to black and white later. You have probably heard that you always want to “get it right in-camera” and don’t wait to fix issues later in post-processing. So it might seem natural that you should start out by setting the camera to shoot in black and white. For the most part, however, you should not do that. Here are some do’s and don’t’s relating to that:
Don’t: Take a black and white photo by taking an JPEG and setting the picture style in your camera to monochrome. There are two reasons for this. First, that means you are taking a JPEG, which is not as good of a file as a Raw file. See this article if that doesn’t mean anything to you. Secondly, you are stuck with the picture in black and white forever. The color information is discarded by the camera immediately and cannot be retrieved.
Do: Take the picture in Raw and convert it to black and white later in Lightroom or Photoshop. That will preserve the color information and give you full control over the image later.
If you really want to see your photo in black and white on the back of your camera, but you want to get the best possible image, there is a trick that will allow you to do this. Set the camera to make two files: one a Raw file that preserves all the data, and the other a JPEG set to monochrome, so you can see the picture in black and white when you take it. To do this, go to your camera’s “image quality” setting, set your camera to take both a Raw file and a JPEG. Then, under camera’s “picture mode,” set it to monochrome. The advantage is that the JPEG is what the camera will show you on the LCD. So you get the benefit of seeing what the picture will look like in black and white on your camera, but the benefit of the better file-type to convert later.
There is one caveat to this advice: If you do not do any post-processing of your images, but want a black and white picture, then you have to take a JPEG and set the picture style to monochrome.

Converting in Lightroom (or ACR)
Lightroom has powerful tools for converting your photo to black and white. If you do not have Lightroom, you can use the Adobe Camera Raw (ACR) screens in Photoshop or Photoshop Elements to do the same things as we are doing here in Lightroom. But, in any case, there are good and not-so-good ways to go about black and white conversions. Take your picture into Lightroom’s Develop Module to start, and then here are some do’s and don’t’s related to that process:
Don’t: Just pull the saturation slider all the way to the left to convert the picture to black and white. The picture will inevitably be flat.
Do: Convert to black and white using the HSL/Color/B&W panel. Click on B&W at the top right. The photo is automatically converted to black and white. What is important about this method is that now you can play with the individual color settings and affect the tones of the individual colors. Look just below the HSL/Color/B&W heading and you will see eight different color channels.
Don’t: Accept Lightroom’s default setting for the color channels. Often this is a very flat-looking image. Instead, play with the individual colors until it looks the way you want. I should note that the process is the same in Photoshop using the Black and White Adjustment Layer.
Add Contrast to Your Black and White Photography
You will find that the best black and white images have plenty of contrast and tones running from white to black. The process you just went through above, where you adjusted the color channels in Lightroom, will add some contrast to your image. But it will probably need additional help. Here are some do’s and don’t’s related to adding contrast:
Do: Add contrast using the Contrast slider. The obvious way to add conrast to your images is to pull the Contrast slider to the right. This will sometimes work really well, so give it a try.
Don’t: Overdo the contrast adjustment. In addition, keep in mind that this is not a tool for all occasions. For example, if you just crank up the Contrast slider, it might just blow out the brightest parts of your picture or push your shadows to pure black.
Do: Use the Highlights, Whites, Shadows, and Blacks sliders to control tones and add contrast to your images. You have more control over contrast in Lightroom by using these sliders. For example, if you are worried about blowing out the highlights, pull the Highlights slider to the left. Use these sliders to control exactly how you want the various aspects of your picture to look.
Add Local Contrast
Once you have adjusted the overall contrast of your picture, you may not be done. One of the most powerful ways for you to add contrast and enhance your picture is by adding local contrast.
Local contrast is just adding contrast to one particular part of your picture. The power of this technique comes from the fact that you are just separating tones within a given area of your picture. For example, in a typical outdoor scene you might want to add contrast to your sky and to your foreground. If you just crank up the Contrast slider (pull it to the right), it will increase contrast in the overall picture, and is likely to make your sky brighter and foreground darker. Likely, your sky will be a little too bright and the foreground a little too dark already, so this is definitely not want you want. But if you select the sky, so you are just making contrast adjustments within that area, you can add contrast and detail without the unwanted effects.
With that in mind, here are some do’s and don’t’s for adding local contrast in Lightroom or Photoshop:
Do: Use the Adjustment Brush in Lightroom. If you do not have Photoshop, use the adjustment Brush in Lightroom to target specific locations within your picture. Then you can adjust the tonal values and contrast for that particular area. The Adjustment Brush is at the very top right of the Develop module. When you click on it, a set of sliders will appear below it. These sliders are the effect that the brush will have on your picture.
Do: Use Photoshop to enhance local contrast. This is an area where Photoshop excels. To do this, you will make a selection of a given area of your picture. I will cover much more about this process elsewhere, but for now follow this quick process:
- Use the Quick Selection tool (in the column of tools on the left hand side of your screen) to select the pixels of that area.
- With those pixels selected, create a Curves Adjustment Layer. (Layer – New Adjustment Layer – Curves)
- Notice that when you create the Curves Adjustment layer, Photoshop automatically creates a layer mask and only the pixels you have selected are in white. That means that when you make the adjustment, only the pixels you selected will be affected.
- Pull in the black point and white points of the histogram in the Curves Adjustment Layer you created. That will increase the local contrast within that area.
- Repeat this process for whatever areas you want to increase local contrast.

Additional Software Techniques
If you have invested in other software, there are some other techniques you can use. Don’t worry if you don’t have this software though. Lightroom will do a really nice job of converting the photo to black and white and adding contrast. There are plenty of pros using just Lightroom and getting great results. In addition, Photoshop is great at this as well, and really excels at adding contrast.
Do: Try Nik software’s Silver Efex Pro 2.
There are a few different programs that are designed to help you make great conversions to black and white. Probably the best and most well-known of these is Silver Efex Pro 2 from Nik. The program will automatically convert your photo to black and white and from there you can make additional adjustments.
Do: Try blending in Photoshop. Use this if you like parts of the Lightroom conversion and parts of the Silver Efex Pro conversion. This is a pro move, and might be too much and too tedious if you are just starting out.
Here’s a quick guide on what to do: make a copy of your photo and convert one to black and white in Lightroom and then convert the other using Silver Efex Pro. Select both photos, right click and select “open as layers in Photoshop.”. Both will open in Photoshop as separate layers of the same file. Look at both layers and decide which parts of each you like best. Add a “reveal all” layer mask to the top layer and mask away (painting in black with your brush tool) the parts of the picture where you want to use the bottom layer. You can even set the opacity to less than 100% if you want to combine them.
Do: Try Topaz’s Clarity to add contrast to your black and white image. This plug-in gives you a variety of contrast controls and presets to use. Given the importance of contrast to black and white photography, this program and its contrast controls can come in quite handy.
Do: Use your favorite HDR sofware in conjunction with black and white conversions. One of the great things about black and white photography is that you can take adjustments further than you can in color without the image looking fake. This allows you to go further with your adjustments. When it comes to HDR, some find the effect unnatural and do not like it. But the “HDR look” is less noticeable in black and white photography. Even those that might otherwise shy away from HDR find they like it in black and white photography.
Conclusion
Although black and white has been around as long as there has been photography, the modern era offers significantly better tools and more flexibility for creating black and white photos. The process above will preserve all the color data in your original picture, while allowing you to convert individual pictures to black and white. The conversion techniques and processing described above are what even the more sophisticated black and white photographers are using. Give these techniques a try to create your own great black and white images.


great info, thanks!!!
Glad you liked it! Thanks!