

About Grey Whale Cove
Grey Whale Cove is on a stretch of coastline that I have shot many times between Santa Cruz and Pacifica. Along this stretch of coastline, there are cliffs, rock formations, beaches, and even a few lighthouses. I have driven up and down this stretch of highway many times looking for the best places to photograph. At some point I stumbled into this cove.
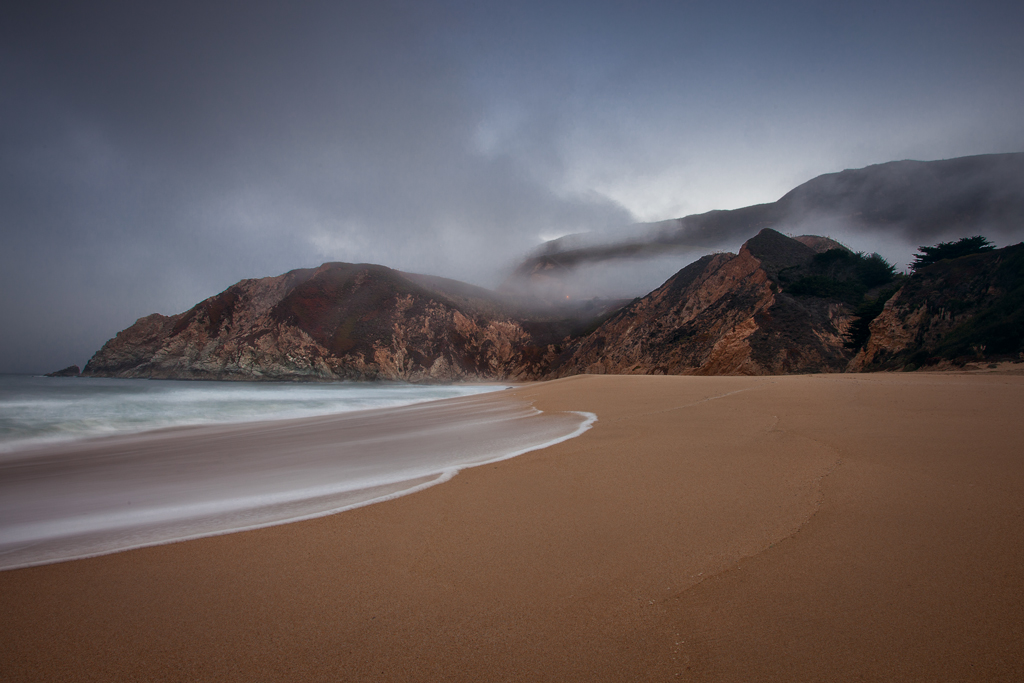
Of all the locations along the coast, why should you stop at this one? There are many reasons. This is a remote beach surrounded by cliffs and interesting, colorful vegetation. There are boulders on the beach that can serve as a center of interest. Here is a quick snapshot I took of the beach as I was leaving it, which shows the overall scene:
Whereas most beaches are just long stretches of sand, this one gives you a lot to work with.
Getting There
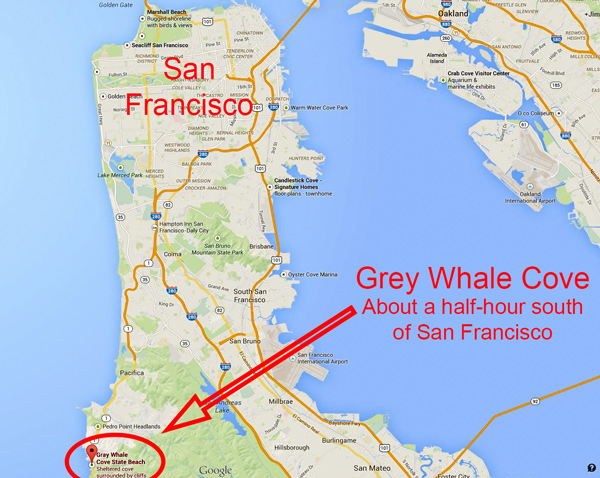
You’ll definitely need a car to get there. If you are headed south along Route 1, it is located less than a mile after you exit the tunnel near the Devil’s Slide Trail. Here is the exact location:
The good news is that there is a small parking lot across the street from the beach. Many times along this highway, there is no place to park or stop (or the hours of the parking are restricted).
Once you park, you cross the street and follow the path. Keep going to the right and you will come to a large wooden staircase. It will take you down to the beach.
Time of Day
When should you go to Grey Whale Cove? Dawn and dusk are nearly always the best times for taking outdoor photos, so those are obvious choices. Both hold true in the case of this location.
Virtually all the photos I have taken at Grey Whale Cove were taken at dawn. It is a great time to go because the light is diffuse. Even after sunset, the cliffs behind you will block the sun for a while.
Sunset might be a better time to visit this beach though. Since it is on the west coast, you could catch a sunset. Of course, you will be facing the sun, so you never know. It is more of a hit or miss affair.
What to Bring With You
One filter assumes great importance whenever you are photographing along a coastline, and that is the graduated neutral density filter. This is necessary because the sky is nearly always much brighter than the foreground. These filters work great on beaches because you often have a straight horizon line. Therefore, I really recommend you make sure you buy one and bring it with you anytime you are shooting a coastline or a beach.
In addition, I recommend you bring neutral density filters. When you are on the coast, it is very important that you be able to slow down your shutter speed. More about this below.
Other than that, you’ll just need the usual stuff: camera, tripod, remote shutter release.
Composition
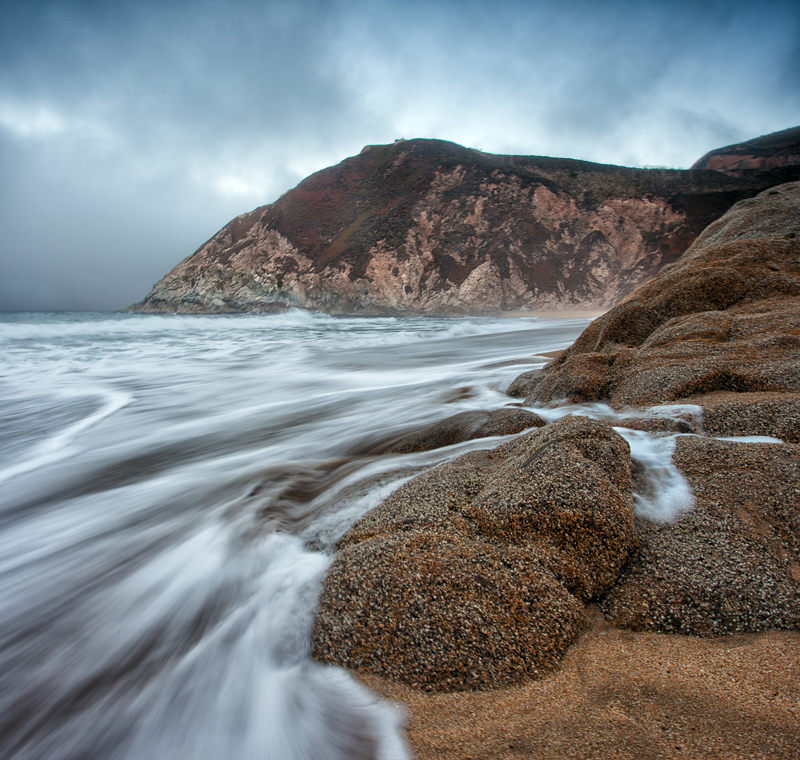
Once you get there with your gear, it is time to set up a shot. The trickiest part of photography on a beach is usually the foreground. If you are out shooting on a beach, odds are you have an interesting background of ocean and sky. Grey Whale Cove is no exception since you have the ocean, cliffs, and/or the sky to work with. However, for the most part the foreground is just a bunch of sand.
There are various ways you can find an interesting foreground. Using the waves sometimes works well. You can also find patterns in the sand, reflections that result in the sand after a wave hits, or other interesting items laying in the sand. Often I use boulders as well.
Spend a lot of your time thinking about the foreground. The background is beautiful here, so that part is easy.
