

I find that many times when people look at a photo and think that they want to take a sharp, detailed picture like the one they are looking at, what they are really seeing is a picture that has been enhanced by adding texture and clarity in post-processing. Often they do not know how to do that post processing, so the effect in the picture looks like magic. It did to me.
Over time, I have learned a number of ways to add texture to photographs using different post processing software. For example, in Lightroom you can add a mixture of clarity and grain to draw out the textures in your photos. There are good plug-ins like Topaz Clarity and Nik’s Color Efex Pro (especially the Tonal Contrast filter) that help with adding texture to photos. But by far the most powerful tool for adding texture to photos is the Curves Adjustment Layer in Photoshop. It gives you precision, power, and control that you can get nowhere else.
In this article I will show you how to use that tool to add texture to your photos. It is a process of making selections and then steepening the curve of the histogram. If it looks complicated – it really isn’t. I’ll walk you through a picture while I describe what is happening in the article.
Step 1: Make a Selection
The first thing you will need to do is make a selection. I will cover this topic separately elsewhere because we could spend an entire day on it. How you go about doing it will really depend upon whether you want a soft edge to your selection or a hard edge. Here is how to do it each way:
Hard Edge: If you want a clean dividing line between your selection and the rest of the selection, use the Quick Selection tool to make your selection. To use it, simply click on the area you want selected and then keep clicking on other areas to add them to the selection. As you do so, Photoshop will add areas to your selection. If parts of the image that you do not want get added to your selection, hold down the Alt key (or Option key on a Mac) while clicking on that area to remove them.
When you do so, Photoshop will show the edge of your selection with a moving dotted line. Most people refer to these as the marching ants.
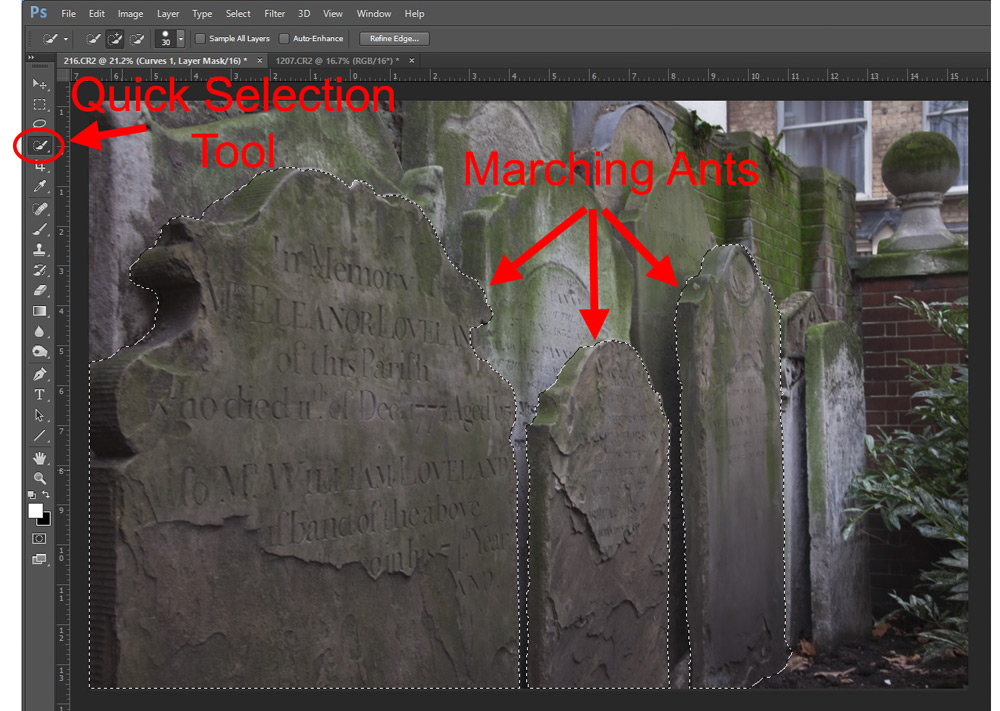
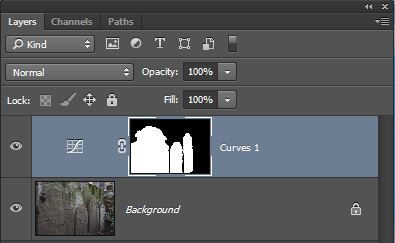
Create the selection before you create the Curves Adjustment Layer. Since you will have a selection made when you create a Curves Adjustment Layer, Photoshop will automatically create a mask for you. The selection portion will be white and the rest of the picture will be black. In your layers palette, it will look like this:
Soft Edge: To create a selection that blends in naturally with its surroundings, use the Brush tool. Create the Curves Adjustment layer first (Layer > New Adjustment Layer > Curves). When you do so, a mask will automatically be created along with your new layer. It will be white, meaning that any changes you make to the image will be applied to the image. Press Ctrl+I to invert the mask, which will make it black. When the mask is black, you will see no changes to the image that were made in that layer. Why would you do that? Because now you are going to select your Brush tool and you will paint with white. You will paint only where you want the effect of your Curves Adjustment Layer to be applied.
Just click and paint on the image where you want the effect. You will see no change to the image as you do so. However, later when you make changes to the curve, they will impact only the area you have selected. If this doesn’t make sense to you now, I will show an example of this below that might help.
Step 2: Steepen the Curve
Next you will create a Curves Adjustment Layer. If you create a selection using the Quick Selection tool (or some other tool), just click Layer > New Adjustment Layer > Curves or click on the Curves Adjustment Layer icon in the layers palette. If you create a selection with a soft edge using the Brush tool, you have already created the Curves Adjustment Layer, but this is where you will change the curve. What we are going to do here is steepen the curve.
The pixels you see in the histogram for the Curves Adjustment Layer are only those for the area you have selected. As per usual with a histogram, the darker tones are to the left and the lighter tones are to the right. We need to make the darker tones slightly darker and the lighter tones slightly lighter. We could do this in one of two ways:
- Drag in the end points. You can pull the black and point to the right and the white and point to the left which will have the effect of steeping the curve for your selection.
- Pull down on the curve on the left side and pull up on the curve on the right side. This will also have the effect of steeping the curve in the meat of your selection.

It really doesn’t matter how you go about modifying the curve as long as you are steeping the curve within the area where most of the pixels reside. When you Steven the curve you are adding contrast. This contrast within the selection adds texture to it.
Step 3: Repeat Elsewhere
Finally, you should go ahead and repeat this process in every area where you want to add texture to your picture. Just make the selection and then use a curves adjustment layer to steep in the curve. This may be just one area of the picture or it may be many. It is up to you.
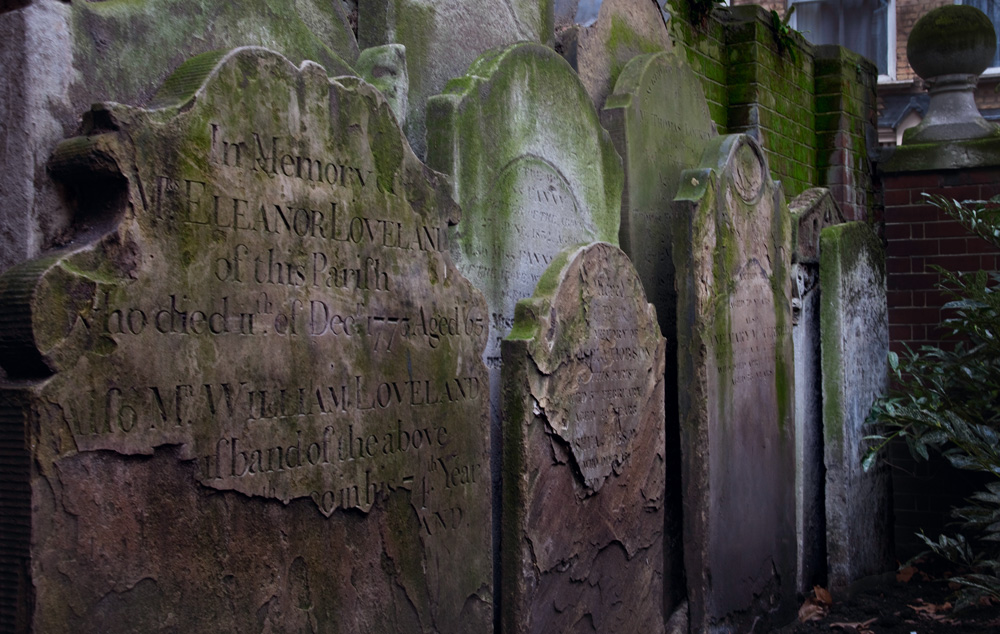
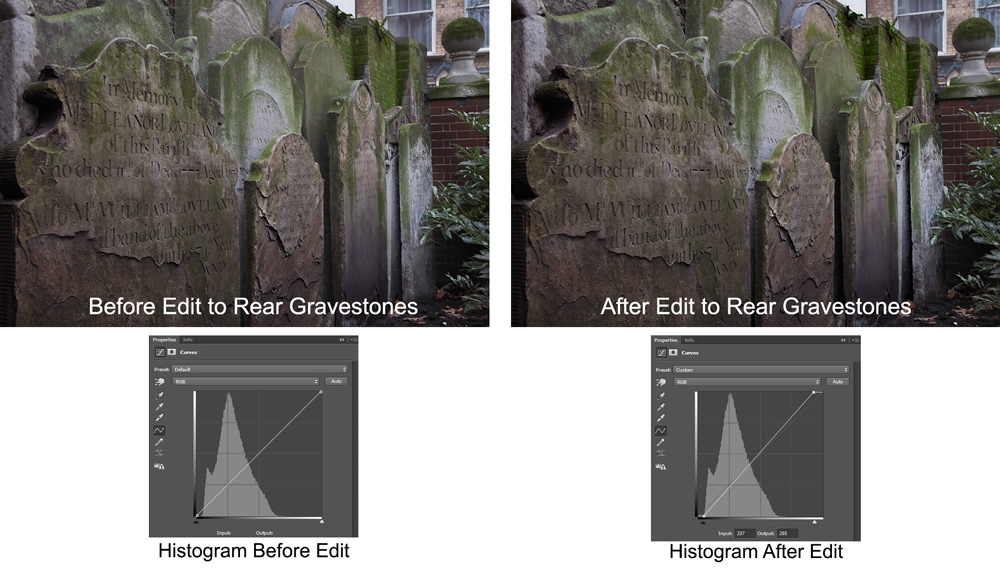
In this case, I decided to add some texture to the rear gravestones. I just repeat the same process as above. First I made my selection and created a Curves Adjustment Layer:
Then I steepened the curve, this time by just pushing in the endpoints:
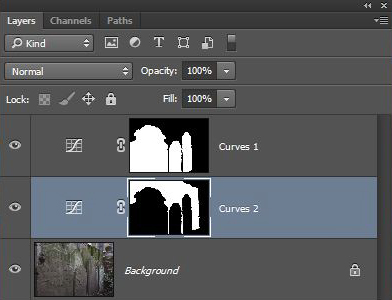
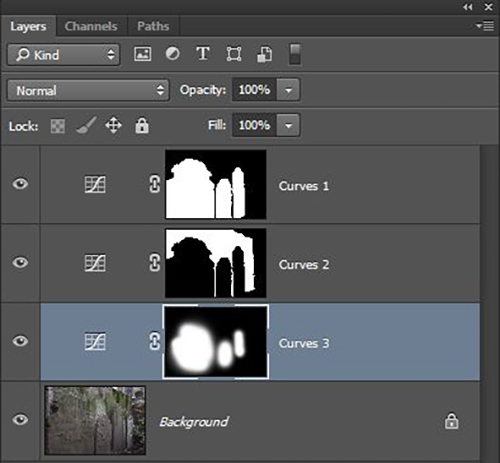
I decided I wanted even more texture to the gravestones where the lettering appears. What to do? Just repeat the process again. This time, however, I’m making my selection with a brush since there is not a defined area I want to select. The additional layer and the mask look like this:
After that, here is how I changed it, again by steepening the curve of the line on the Curves Adjustment Layer:
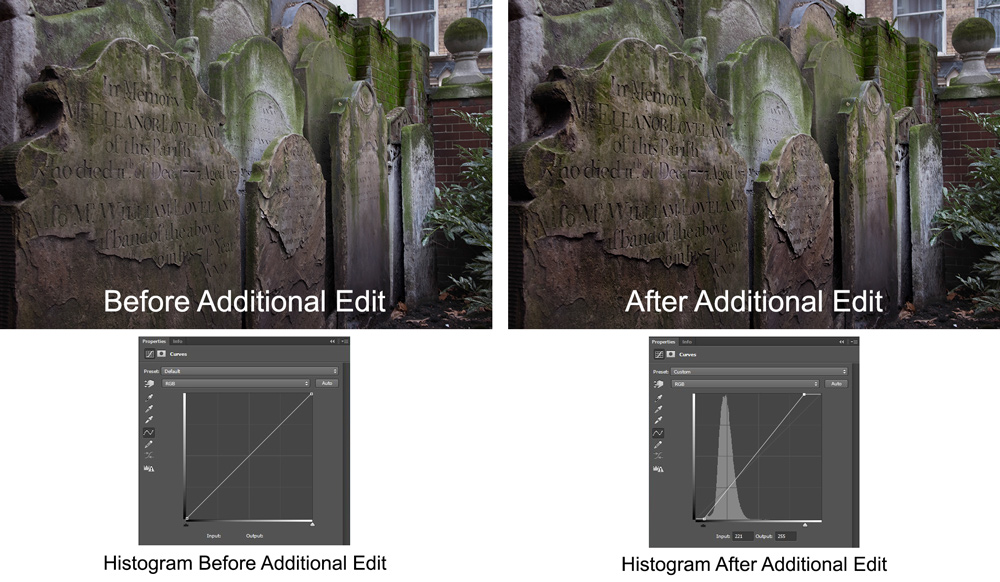
If you are wondering why there are no pixels in the histogram to the left (above), it is because they don’t show up until you adjust the curve when you use the Brush tool to select them. Once you either move your endpoints or pull/push the line, then the pixels will appear in the histogram.
Using the Curves Adjustment Layer From Here
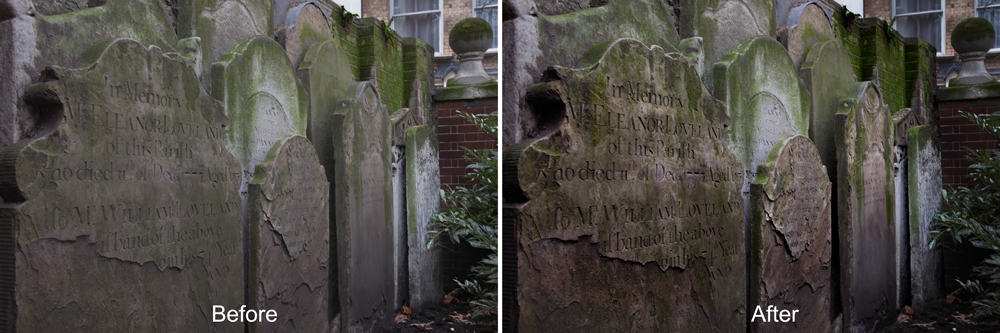
To finish the picture, the only other thing I did was add a little bit of darkening to the right side (of course using a Curves Adjustment Layer). After doing that, here is the before and after of the photo:
A couple thoughts before we leave this topic:
- The idea here is to keep the brightness values the same. You are only looking to add to contrast. Therefore, click on the little eyeball in front of each layer to check your brightness values it. Of course, you can make your selections lighter or darker depending on your purposes.
- You might find that making changes in the manner suggested in this article adds a little bit of a color cast to your photo. That is because when you change the curve you are changing it for all color channels equally. Some colors may be more prominent in some areas of the histogram than others. If you want to fix that, check the histogram for the individual color channels in your curves adjustment later. If you don’t know how to do that, we’ll cover it in another article.
- This may take you a while to work through at first. After a while, you will fly through the process and it will only take seconds.
The Curves Adjustment Layer is the most powerful tool in Photoshop. Frankly, I believe it is the most powerful tool in any photography post-processing application. You can use it to change brightness, contrast, color, sharpness, and (as we saw here) texture. Using it in this way, you have complete control over what areas of the picture you want to change, and how much contrast you want to add.
Keep in mind that all we have done here is add texture. You might be thinking to yourself that you could do that just was well, and perhaps simpler, with another tool or other software. You would not have the degree of control though, either over the selection or over the adding of the texture. Perhaps more importantly, however, is the fact that you can use Curves Adjustment Layers to brighten or darken or adjust the color at the same time. In this case, I tried to keep the relative brightness values about the same. I made no change to color at all. But I could have. We’ll get into that in future articles.
In the next article we will see how to use it to increased clarity in your photos.