
When you are just starting out with photography the whole flash thing can just seems like a complete mystery. Sometimes the flash pops up, sometimes it doesn’t. Sometimes is lights things up, sometimes it doesn’t. And sometimes it creates a harsh glare. When I was starting out, I always felt like I was doing something wrong, but the whole thing seemed too technical and tedious to figure out.
I’m here to tell you it is not, and I will show you in just a few easy steps. It is time to tame this beast.

Preliminaries
Before we start, there are a couple of preliminaries.
First, just forget about that popup flash on your camera. This will actually be very easy if you bought a high-end camera, since your camera likely didn’t even come with a popup flash.
Incidentally, that tells you something about the popup flash, doesn’t it? It gets eliminated as you pay more for the camera. The reason is that it is junk. It is difficult to control the amount or direction of the light coming from it. Vow to stop using it. (However, I will give you some tips for trying to tame it below, if you are not ready to give up on it.)
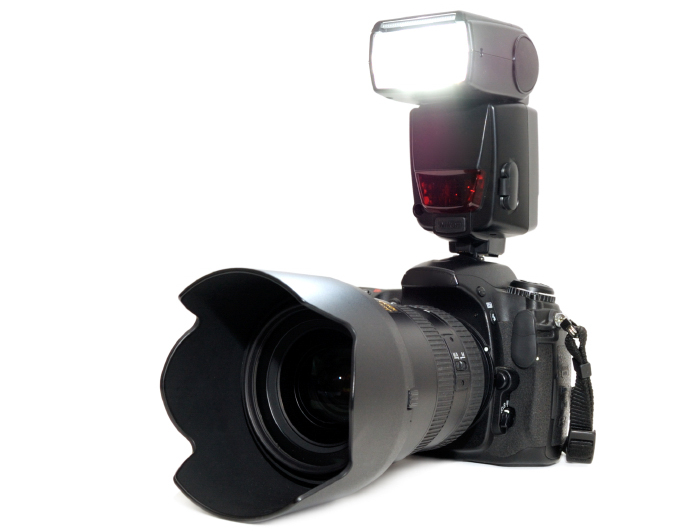
Next, go ahead and buy a separate flash unit for your camera, but I would caution against your natural tendency to buy “name brand” Canon or Nikon models. If you buy the current models, it will cost you about $500! It is highway robbery, and thankfully there are good alternatives available. I recommend the Yongnuo YN-560 II Speedlight. It is a cheap $70 flash unit. It works well and reliable.
Now we are going to get into the steps of using the flash. Think of each of these steps as a building process. That is very important. If you try to do everything at once, it will not look right, you will not know where you went wrong, and it will lead to frustration. So just do each step, take a few pictures and make sure you have it right, and move on to the next step.
Here we go.
Step 1: Just Use It
Now that you have your new flash unit, the first step is easy. Just attach it to your camera and use it a few times. There is no trick to this.
The point is that when you need additional light, your pictures are better with even straight, undiffused flash than without. So you are better off already. We get so obsessed with perfection that we ignore the obvious improvement we are getting from the unit.
Step 2: Diffuse the Light
Next step is to diffuse the light coming off your flash. There is a simple and cheap device called a diffuser. You can try this one. Much nicer, isn’t it?
If you don’t have a diffuser, or you are still using a popup flash, there are DIY ways to cut back on the amount of light hitting your subject. Try putting an index card at a 45 degee angle in front of the flash. Or, in a pinch, try putting your hand in front of the flash. Don’t cover it entirely, just enough to take the harshness out.
Simple but effective. This one simple trick should make your flash photography look 100% better.
Step 3: Power It Down
Even with the diffuser, the flash may still overpower the picture. But did you know there are ways to dial back the amount of flash you use?
There are two ways to do this:
First, you can just set the power on the flash itself. There will be controls on the flash to limit the amount of light. Just operate the controls on your flash. Put them on lower settings. If need be – and I hope this isn’t too controversial – read the instructions.
You can also do this by setting the Flash Exposure Compensation on your camera. Go ahead and dial it back at least one stop. This method will work for separate flash units or for your popup flash.
Step 4: Play the Bounce
Instead of aiming the flash at the subject, aim it straight up. Or aim it to the right and to the left. This will cause the light to “bounce” off objects or walls before reaching the subject, which will diffuse the light.
Your pictures should be much, much better now. We could stop there and be happy. But let’s carry on and add another step.
Step 5: Get it off camera
There is a reason studio pros set up lightstands off to the sides of their models. Light looks better and more natural if it is coming from the side.
You could set up stands and umbrellas. But we’re going for a quick and easy fix that lets you stay mobile. Plus you don’t want to carry all that stuff around with you. That makes this a bit trickier.
Instead of connecting the flash directly to the camera, try using a cable. Try this one. Now you can hold the flash unit out to the side while you take the picture. Of course, that will mean you have to control the camera with one hand. You can also find something to put your flash on to let it come in from the side.
You could do this with remote controls, and that can obviously be better, but it adds a little bit of expense and complexity. It doesn’t have to be too expensive, and Yongnuo makes remote triggers you connect to your camera and flash that cost about $40. So if you think you are going to be using a lot of flash, it is probably worth it to set yourself up with remotes.
You now have diffused, powered-down flash coming from off camera. That’s a pro move! And we’re doing it without umbrella stands and assistants.
Conclusion
Flash is always an experiment. So remember that that in digital photography you can take as many pictures as you want. That is important when it comes to flash photography, as you can use these steps to “build up” to your final picture.
For example, you could do something like this:
- Start by taking a picture without any flash. That picture will be crap, but it will give you a sense of the light that will be in the background. Get that right first.
- Then add a flash and see how it looks at full power. That picture will be better than the one with no flash, but the flash on your subject will probably be harsh at this point.
- Then add a diffuser. By now it should be that the picture is actually starting to look ok.
- Then try bouncing the flash. Now you are really on to something.
- Finally try moving the flash unit to one side or the other. You can really add some drama or make it look more natural that way.
As you experiment and build up to your final picture, don’t worry if most of your pictures are junk. You only need one.