

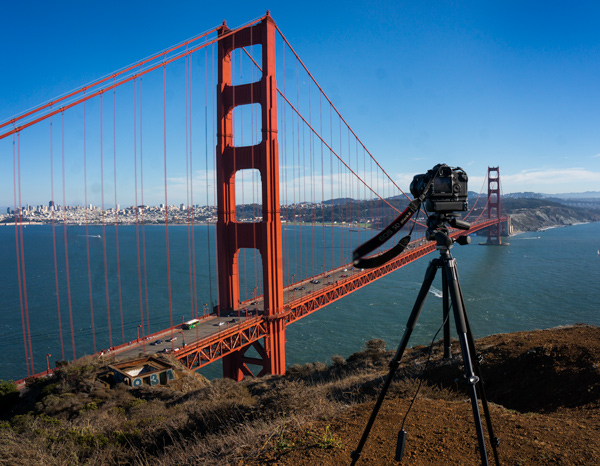
Using a tripod opens up a world of possibilities. It allows you to use slower shutter speeds than you would otherwise be able to use. You can blur out the water in waves or waterfalls. You can create star trails. Or you can just make sure your shot is tack sharp.
But to do so, you should know the ways to best use your tripod. It is not that the basics of tripod are complicated. Using a tripod is simple: you just attach your camera to the head and aim at your subject.
But if you are not careful, you might have great shots ruined. Remember that you might have your shutter open for 30 seconds or longer (sometimes much longer) so you have to make sure you camera stays absolutely still during that time. It can be easier said than done sometimes, for example in high winds or unstable ground.
So this article will show you 10 keys to getting the most out of your tripod use.
Make Sure Your Tripod is Stable
First, let’s make sure that your tripod is good and stable. The first four tips will focus on helping you do that.
1. Don’t Use the Center Column
When you set the height of your tripod, set it to the height that you want without using the center column. Use of the center column is notorious for adding instability.
Notice that when you extend the legs of the tripod, they extend out in 3 directions. Extending the legs out in that fashion inherently leads to stability. Extending the center column, however, does the opposite. It just goes straight up and moves your camera away from the stable base. So set the height using the legs – not the center column.
There are times when your particular shot might require more height than extending the legs of your tripod can get you. In that case, where the choice is extending the center column and getting the shot, or not extending the center column and not getting the shot, then by all means, get the shot. But try hard not to use the center column otherwise.
2. Use the Fat Parts of the Legs First
If you are not putting your tripod to its full height, then you have a choice of extending the legs at the fat part (nearer the head of the tripod), or the narrow, spindly part (near the feet of the tripod). Extend the fat part of the legs.
The fat parts of the tripod legs are more substantial and therefore a little more stable.
3. Set the Legs Wide
Most tripods allow you to set how wide you want the legs. The wider the legs, the greater the stability. Therefore, if you are not setting your tripod up to its full height, you can also set the legs wider.
You might not need to worry about this on a calm day where there is no wind pushing on the tripod. But setting the legs wider can save your shot on windy days.
This technique will also let you get lower to the ground, which is often key to good landscape photos.
4. Use tripod collar for long lenses
You want the heaviest part of your camera rig sitting right on top of the tripod. Long lenses are heavy and if you let them hang off the side of the tripod attachment this can lead to instability. The weight can also cause the camera to sag a little bit over a long exposure, which will ruin your picture.
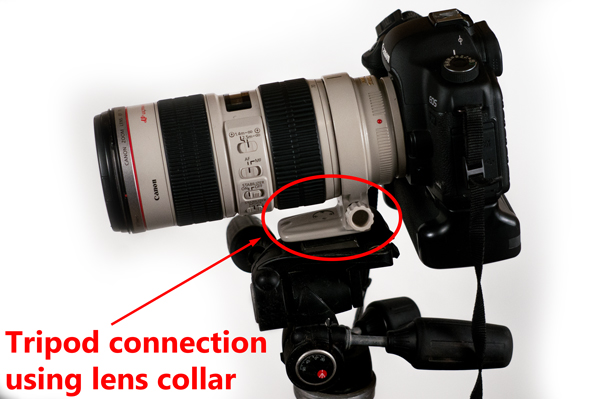
To avoid this, use the “tripod collar” that comes with most long lenses. The tripod collar is a place to attach the lens – not the camera – to the tripod. Attach the lens to the tripod using this collar and let the camera hang off the back.
Avoid Vibrations and other Movements
Now that you have a good stable tripod set up, you want to avoid any vibration associated with the taking of the pictures. Here are 3 tips for doing that:
5. Use a Remote Shutter release
This device is essentially a remote control for your camera so that you will not shake it by pressing the shutter button. They come in wired or wireless versions. They are very cheap if you don’t buy the Canon or Nikon versions.
I recommend you keep a wired version for day-to-day use. I have owned several and they have all worked flawlessly.
But keep a wireless version for those times what you want to be in the picture and do not want to have to use the timer with the running behind the camera and then in front of the camera that this necessarily entails.
6. Mirror Lock-Up
If you are shooting with a DSLR, there is always the worry that the flipping of the mirror when you trigger the shutter will create a slight vibration that will add an element of blur to your pictures.
Fortunately, many DSLRs have a “mirror lock-up” function where the mirror is set to the “up” position in advance of the shot. That way, when you take the picture, there is no mirror movement and therefore no vibration.
If you set your camera to mirror lock-up, taking the picture will require two pushes of the shutter release button. The first time you press it, the mirror is locked up. The second time you press it takes the picture. I typically wait a few seconds between the first and second pushes of the button to let any vibrations work their way out.
If you are shooting in Live View, then your mirror is already locked up, so you do not need to worry about it.
7. Be Sure the Tripod Controls are Tight
If your settings are not tight, the weight of the camera and lens might cause a little bit of sag or slippage during the picture.
This may not be much of an issue if your shutter speed is 1/4 second, but if your exposure is more than a couple of seconds it can cause problems. That slight sag will blur the picture and perhaps ruin it. Just a quick double-check of your controls will make sure this does not happen to you.
Dealing with the Elements
Using tripods for outdoor photography necessarily means you are out in the elements. Flat, hard ground on a windless day won’t cause any problems, but all too frequently you find yourself on a slope, on unstable ground, facing high winds. The final tips in this article are designed to help you deal with these tricky elements.
8. Attach some Weight
We have already talked about stabilizing the tripod by keeping the legs wide and not using the center column. You will occasionally find yourself in high winds that require more extreme measures. Sometimes the winds are high enough to ruin your shot. But there are also some times the winds will actually be strong enough to blow over your tripod and cause a catastrophe!
A good way to add stability to your tripod is to add some weight to it. At the bottom of the center column, some tripods have a hook. You can attach your camera bag to that hook to add weight to it. If your tripod doesn’t come with a hook, you can add one.
This measure will add stability for your shot, and also keep your tripod from blowing over.
9. Strap On
As mentioned above, particularly on coastlines and on mountains, you can face extremely high winds. Occasionally, a gust will be strong enough to blow over your tripod if you are not careful. Spreading the legs and attaching the weight will almost always be enough to counteract that force. But you might have thousands of dollars worth of photography equipment at risk, so you cannot be too careful.
You could actually hold on to your tripod or camera, but that could lead to vibrations during the shot. So just hook the camera strap around your wrist as you are taking the picture. That way, if you were to catch a particularly strong gust of wind the camera is connected to you and you can save it.
That will also keep your camera strap from flapping around in the wind.
10. Dig In
When you are faced with sand or unstable ground, dig in by pushing your tripod feet down in the ground.
When you are in sand, do this a lot. When I am in the sand, I will typically push the tripod in as far as I can, sometimes a foot into the sand. Then let a wave or two come by, and push it in some more. After that, you can be reasonably sure your tripod is stable, even if waves touch the base of your tripod.
Obviously, some caution is warranted when doing this so you don’t get your camera wet.
Conclusion
These tips will help you maximize the benefit of your tripod. Individually, the effects might be minute, but collectively, they add up. And in photography, very often the case between a great picture and a pretty good picture is a series of very minute adjustments and changes. Give them a try next time you have your tripod in use.
What about tripods that do not have a center column; like ‘Really Right Stuff’ or a ‘Gitzo’ or for that matter any ‘column-less’ tripod
Good point. I purposefully didn’t get into anything related to which sort of tripod to buy (I am contemplating a separate article about that), but not having a center-column will certainly eliminate any issues related to instability from the center column! I’m curious if you have such a tripod, and do you like it?
I will say that I like having the center-column. I try hard not to use the center column for the reasons stated above, but every now and then having my camera set up higher than the legs will allow is more important to me than the extra stability that not using the center column provides. But maybe I should just get a tripod with longer legs.
Nice article. I learned a few tricks.
N.B. I have found a little typo:
“Using tripds for outdoor photography necessarily means you are out in the elements.”
I think you sould replace “tripds” with “tripods”.
Thanks! And I’m glad it helped a little.
And good catch on the typo, I’ve fixed it.