
There is probably no rule in photography as well known as the “Rule of Thirds.” And for good reason. It serves is a simple yet fundamental principle to use for taking good pictures. In this article I will explain what it is and show you how to use it. If you are already familiar with the rule of thirds, I will also provide some additional tips for using it.
Understanding the Rule of Thirds
The Rule of Thirds is a principle of composition that says that pictures appear more balanced and interesting to the human eye when they are arranged along “thirds” of the picture. So basically you want to think of your photo as if it was divided up into thirds vertically and horizontally.
Vertically, you should think of your photo like this:
In other words, you should think of your photo as having a bottom third, middle third, and top third.
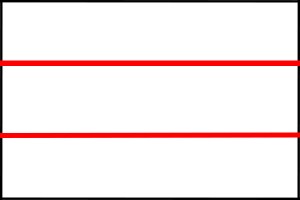
Horizontally, think of your photo like this:

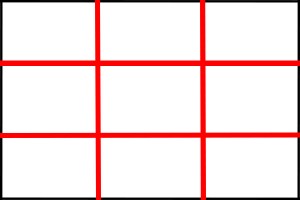
Therefore, overall, you should think of the layout of your photo like this:
This is not an exact science, and it does not have to be exactly on the line. But it should be close.
Arranging your photos in this manner, if you are not already doing so, will drastically improve your composition. We all have a tendency to want to put our subjects right in the center of the frame. Unfortunately, this is usually just uninteresting to our viewers. By placing subjects, items of interest, and other compositional elements along these third-lines, it makes the pictures appear more dynamic and interesting.
Let’s take a look at the use of the rule of thirds in action.
Applying the Rule of Thirds vertically.
Perhaps the simplest manner of applying the Rule of Thirds is vertically. You will confront this constantly in outdoor photography because, if nothing else, many of your photos will contain the horizon line.
In applying the Rule of Thirds to your outdoor photos, whenever possible place the horizon line either one-third from the top of the photo or one-third from the bottom of the photo. Avoid the middle of the frame unless there are reflections and/or you are going for a sense of symmetry.
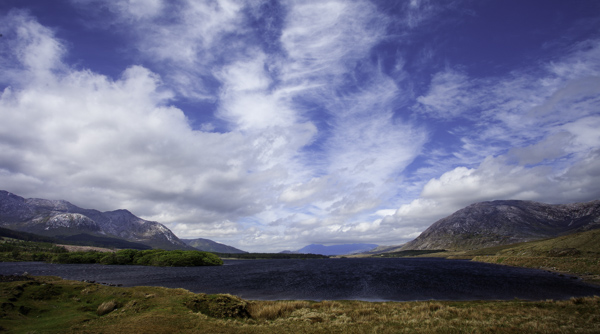
Essentially, if the focus of your photo is the sky, or you wish to emphasize the wide open nature of your scene, put the arising line on the bottom third line like this:
Conversely, if the focus of your photo is the ground, but you still want the horizon line in your picture, place it at the top third line. Here’s an example of such a photo:
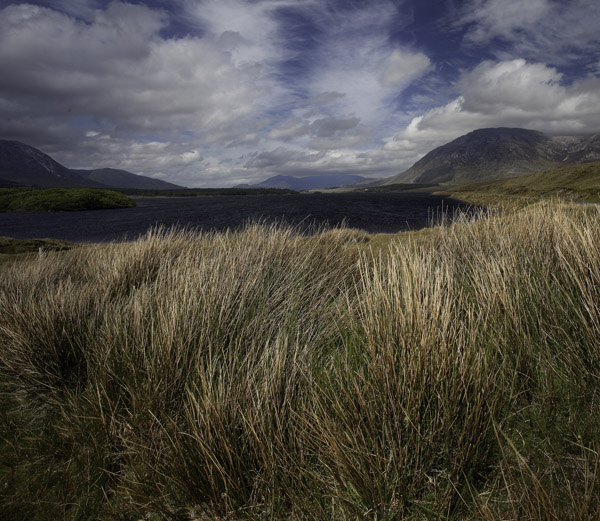
Both photos were taken at exactly the same place (in the Connemara region in northwestern Ireland) at essentially the same time. The primary difference is how I dealt with the horizon line. The point is not which picture is better, but rather the subject and what the picture conveys. I believe the top picture, by moving the horizon line down and focusing on the sky, conveys how wide-open and remote the area is. I think the bottom picture, by moving the horizon line up, conveys a sense of wildness by showing the wild grasses.
But no matter what, the pictures are very different and that is based largely on the placement of the horizon line via the Rule of Thirds. Placing the horizon line in the middle would have conveyed nothing, and been pretty uninteresting.
Applying the rule of thirds horizontally.
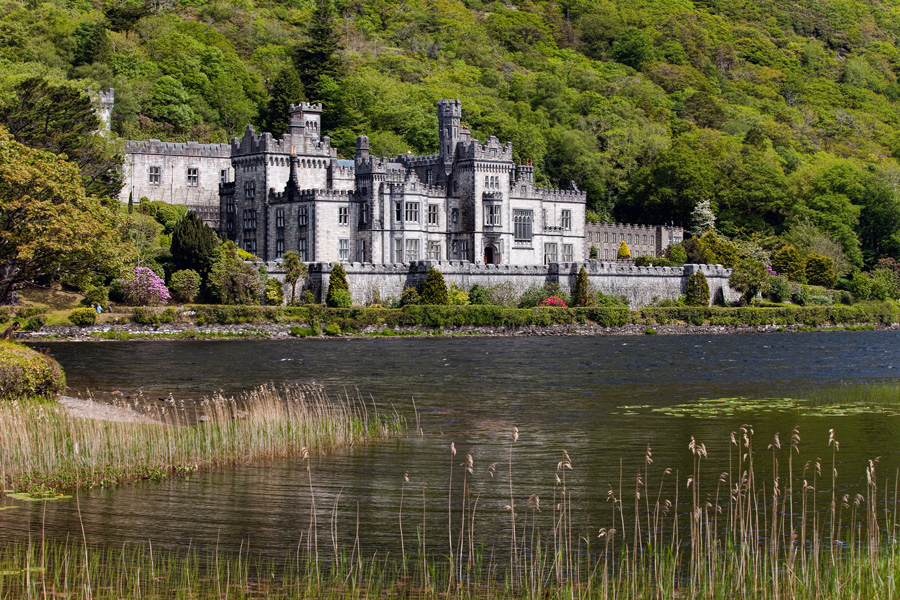
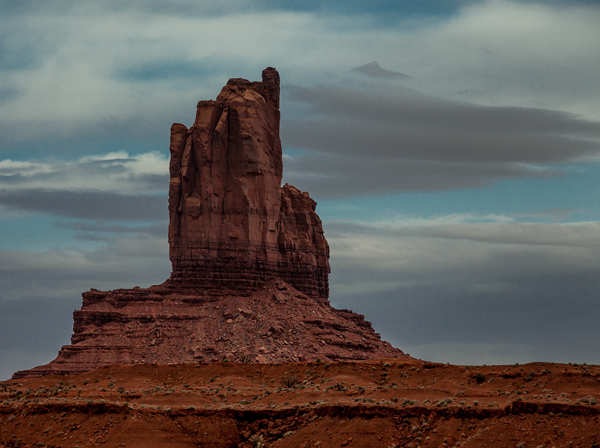
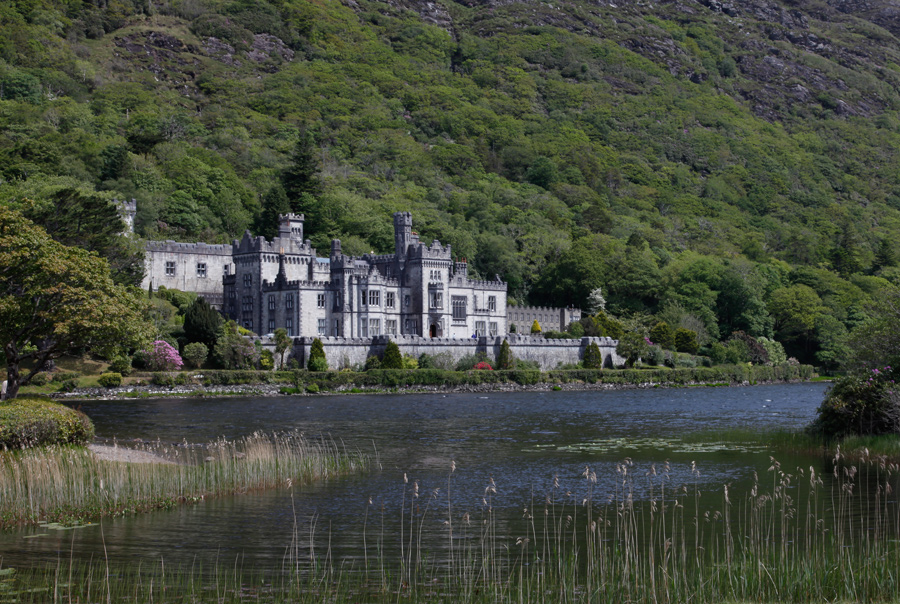
The Rule of Thirds also works in a left to right fashion. What this means for your photos is that you will typically want your subject or an item of interest along one of the lines that divides the picture vertically. Here’s an example:
And here is another:
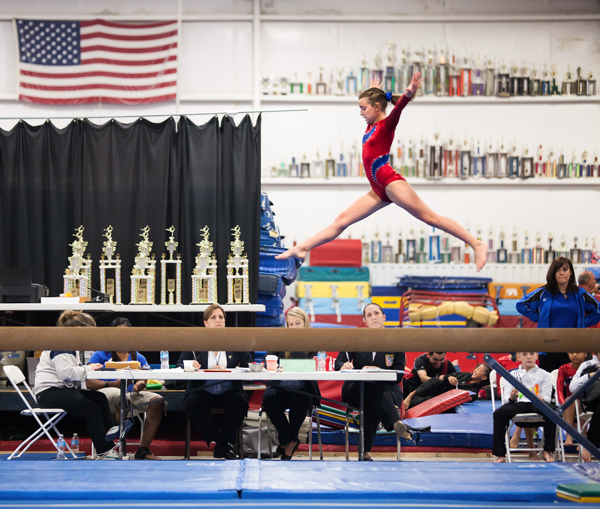
If your subject is a person, then you may wonder which side of the frame to put that person in. Place them so that the person is looking into the picture. Here’s an example:
If they are looking out of the frame, the picture looks cramped and appears off-balance.
Again, this is not an exact science. The key takeaway in one sense is simply to not place items directly in the center of your photo.
Using the points.
Another interesting aspect of the Rule of Thirds is that the intersection of the grid-lines creates points as follows:

As you get comfortable with composition and the Rule of Thirds, you can begin to use these points to place items in your picture. Items placed on these points will have particular power and focus.
When to use the rule of thirds.
You should use the Rule of Thirds at every opportunity. When you are just starting out with photography you should attempt to use it all the time.
Photographers frequently chafe at the use of the word “rule.” After all, photography essentially is art and in art there are no real rules. Plus free-thinking artists seem to hate the very concept of rules. So they will advise that you should feel free to break the Rule of Thirds whenever you think it necessary or desirable.
My advice is slightly different. My advise is to really try to follow the Rule of Thirds for at least the first few years of your photography. Try to apply it most of the time, unless you are specifically trying to achieve a sense of symmetry. Only when you have mastered the rule and mastered other principles of composition should you begin to selectively discard the rule. Don’t disregard the rule before you have mastered it.
Use the rule of thirds in post.
The Rule of Thirds is not just useful when you were shooting. In fact, it is perhaps even more useful in the post-processing of your photos. When you are out shooting, you may have been hurried, and sitting at your computer later is a good time to crop the photo a bit so that it more closely follows the Rule of Thirds.
Photoshop and Lightroom make it very easy to apply the Rule of Thirds. When you use the crop tool in either program, a grid showing the Rule of Thirds will be superimposed over your photos. Use this grid to make your photos correspond to the Rule of Thirds.
Simple But Powerful
The Rule of Thirds is simple but powerful. Think about it while you are shooting and then again when you are editing your photos. If you are not already using it, you will see immediate improvement in your photos.